← All 50 books
Book 48 of 50 · Free
Building an AI Portfolio
25,966 words · 26 chapters · illustrated
Book 48 of 50 · Free
25,966 words · 26 chapters · illustrated
Book 48 of 50 — AstolixGen Learning Series (Detailed Edition) For researcher and publication students
When you apply for a research assistantship, an MS or PhD position, an industry internship, or your first AI job, one question matters more than almost any other: can you show me the work? Certificates prove you watched a course. Transcripts prove you passed exams. But neither proves you can take a messy dataset, frame a real question, build a working model, and explain what it means. That is exactly what an AI portfolio does — it is a public, organized, and honest record of things you have actually built. This book walks you, step by step, from zero portfolio to a complete body of work: choosing the right projects, documenting them so people actually read them, hosting them on GitHub, explaining them in blog posts, testing yourself in competitions, contributing to open source, and presenting everything in interviews. Every chapter is written for researcher and publication students — people who need their portfolio to open doors to labs, supervisors, journals, and employers alike.
By the end of this book, you will be able to:
| Chapter | Guiding question | Key takeaway |
|---|---|---|
| 1. Why a Portfolio Beats a Certificate | Why do employers and supervisors trust projects more than credentials? | A portfolio is verifiable proof of skill; certificates are claims without evidence. |
| 2. Choosing Projects That Impress | How do you pick projects worth your limited time? | Choose projects that solve a real problem, show one clear skill, and fit a realistic scope. |
| 3. Project One: End-to-End Data Analysis | What does a complete analysis project look like? | A polished analysis answers one question cleanly, with reproducible code and honest interpretation. |
| 4. Project Two: A Machine Learning Model, Deployed | How do you turn a model into something people can use? | Deployment — even a simple web app — transforms a model from homework into a product. |
| 5. Project Three: Deep Learning or LLM Application | How do you show you can work with modern AI? | A well-documented deep learning or LLM project proves you can handle today's most requested skills. |
| 6. Writing Project READMEs | How do you make strangers understand your work in 60 seconds? | A great README is a story: the problem, what you built, how to run it, and what you learned. |
| 7. GitHub as Your Resume | How does your profile speak when you are not in the room? | A curated profile — pinned projects, clean repos, contribution history — reads as professional evidence. |
| 8. Blogging: Explaining Your Work in Public | Why write about work you already finished? | Writing teaches you, clarifies your thinking, and makes your expertise visible to the world. |
| 9. Kaggle and Competitions | How do you learn under real pressure? | Competitions give you real data, deadlines, community feedback, and public proof of rank. |
| 10. Contributing to Open Source | How do you prove you can work on someone else's code? | Small, careful contributions to real projects are one of the strongest signals on a resume. |
| 11. Presenting Your Portfolio in Interviews | How do you talk about your work under scrutiny? | A structured project story — problem, approach, result, reflection — wins interviews. |
| 12. Maintaining and Growing Your Portfolio | What happens after the portfolio is "done"? | A portfolio is never finished; it is a living record you prune, refresh, and extend each year. |
| Piece | What it shows | Effort level |
|---|---|---|
| End-to-end data analysis (Chapter 3) | Data cleaning, statistics, visualization, storytelling | Medium (2-4 weeks) |
| Deployed ML model web app (Chapter 4) | Modeling, evaluation, software engineering, deployment | Medium-High (3-6 weeks) |
| Deep learning or LLM application (Chapter 5) | Modern AI skills, API use, responsible documentation | Medium-High (3-6 weeks) |
| Professional README files (Chapter 6) | Communication, documentation discipline | Low (a few days per project) |
| Curated GitHub profile (Chapter 7) | Consistency, version control, professional presence | Low (ongoing) |
| Technical blog posts (Chapter 8) | Writing ability, teaching skill, public thinking | Low-Medium (1 week per post) |
| Kaggle notebooks / competition entries (Chapter 9) | Competitive modeling, experimentation, ranking | Medium (2-4 weeks per competition) |
| Open-source contributions (Chapter 10) | Collaboration, code review, real-world code | Medium (ongoing) |
| Interview-ready project walkthroughs (Chapter 11) | Presentation, defending technical choices | Low (a few days of practice) |
| Portfolio maintenance routine (Chapter 12) | Professionalism, growth mindset | Low (a few hours per quarter) |
| Book part | How it helps a researcher's workflow |
|---|---|
| Chapters 1-2 | Frame your research identity: what problems you work on and why they matter. |
| Chapters 3-5 | The three core projects mirror research skills: analysis, modeling, and modern AI — directly reusable in thesis experiments and lab work. |
| Chapter 6 | README writing is the same craft as writing a good methods section: reproducibility in plain language. |
| Chapter 7 | Supervisors and admissions committees routinely check GitHub; a curated profile supports your application silently. |
| Chapter 8 | Blogging builds the habit of public explanation — the foundation of paper writing and conference talks. |
| Chapter 9 | Competitions train experimental discipline: baselines, ablations, honest reporting — the core of good research. |
| Chapter 10 | Open-source contribution is collaborative research in code; it also produces citable artifacts. |
| Chapter 11 | Interview storytelling is conference-presentation storytelling: clear problem, method, result, reflection. |
| Chapter 12 | A maintained portfolio becomes a research archive — past experiments you can revisit, extend, and cite. |
Let us begin with a hard truth that saves many students a great deal of wasted effort: a certificate that says you completed an online course tells an employer or a supervisor almost nothing about what you can actually do. It says you enrolled, and it says you finished watching or submitting something. It does not say whether you understood the material, whether you could repeat the work without guidance, or whether you could adapt it to a problem nobody has seen before. Everyone reviewing applications knows this, because everyone has seen candidates with impressive certificates who cannot answer a basic technical question in an interview.
A portfolio, on the other hand, is evidence. When a reviewer clicks a link and sees a working web application that predicts crop yield from weather data, with clean code, a readable README, and honest notes about the model's limitations — that is proof. It is proof you can acquire data, clean it, choose a model, evaluate it, write code someone else can read, and deploy it so others can use it. No certificate communicates that. A portfolio is not a claim; it is an exhibit.
Consider the two sides of the reviewer's desk. A hiring manager at a data science company might receive two hundred applications for one junior role. She cannot interview all of them, so she filters. Certificates from well-known platforms might keep an applicant in the pile, but they rarely move anyone to the top. What moves someone to the top is a link to a GitHub profile with two or three finished, documented projects. In five minutes she can see the quality of the code, the quality of the thinking, and the quality of the communication. That five-minute scan is worth more than any stack of certificates, because it shows the actual work.
The same logic applies in academia, where you as a researcher or publication student live. When a professor considers taking on a new MS or PhD student, or when a lab selects a research assistant, they are really asking one question: can this person do independent work? Your grades answer a different question — they answer whether you can follow instructions and perform on exams. Your portfolio answers the real question. A student who shows up with a public repository containing a careful analysis of a public dataset, documented experiments, and a short blog post explaining the findings looks like someone who can start contributing to a lab on day one. That student gets the meeting.
There is a second, quieter reason portfolios beat certificates: the learning is deeper. Passive learning — watching videos, reading slides — creates the illusion of competence. Psychologists call this the "illusion of explanatory depth": we feel we understand something because we have heard it explained well. Building a portfolio project shatters that illusion in the most useful way possible. When you try to deploy a model and the web framework throws an error, or when your accuracy metric looks great until you realize the data leaked the target variable, you learn the lesson permanently. The struggle is the education. A portfolio is therefore not just a signal to others; it is a record of genuine learning that certificates cannot provide.
A third advantage is durability. Certificates expire in relevance. A certificate from a course you took three years ago says little about your current skills. But a portfolio grows with you. Projects you built last year can be improved, extended, and referenced. A blog post you wrote in your first year of study still demonstrates your thinking when you apply for a PhD program in your final year. Your portfolio compounds — every project, every post, every contribution makes the whole thing stronger. It becomes a body of work, and a body of work is how researchers are ultimately judged: by what they have produced, not by what they have attended.
Let us be concrete about what counts as portfolio material, because students often misunderstand this. A portfolio is not a folder of class assignments. Homework is written for a grader; a portfolio piece is written for a stranger. The difference matters. An assignment notebook might have cells run out of order, uncommented magic numbers, and a final paragraph written the night before the deadline. A portfolio project is cleaned, organized, documented, and explained so that someone with no context can understand it in five minutes. The same work can be transformed from assignment to portfolio piece — and that transformation is itself a skill worth learning. Many of your class projects are excellent raw material; they just need the portfolio treatment.
There is also an important distinction between a portfolio and a resume. A resume is a summary: it tells the reader what you claim to know and have done. A portfolio is the evidence behind the summary: it lets the reader verify the claims. The two work together. Your resume says "built a churn prediction model with 89% accuracy"; your portfolio links to the repository where the reviewer can see the data pipeline, the feature engineering, the cross-validation setup, and the honest discussion of where the model fails. Together they are convincing. Apart, the resume is a promise and the portfolio is a vault of proof.
Some students worry that they have nothing impressive enough to show. This worry is misplaced. A portfolio does not need breakthrough research or production-scale systems. It needs completed, well-documented work. A careful exploratory analysis of a public dataset, a simple model deployed as a web app, a thoughtful blog post about a failure — these are all portfolio pieces. What impresses reviewers is not scale but quality of thought: clear questions, honest methods, readable code, and reflection on limitations. One excellent small project beats three sprawling unfinished ones every time. In fact, unfinished projects actively hurt a portfolio, because they suggest you cannot finish things. Start small, finish completely, document well.
Another common objection is time: "I am busy with coursework and research; I have no time for extra projects." The answer is that your portfolio should not be extra work — it should be the visible packaging of work you are already doing. Your course projects, your thesis experiments, your lab tasks: each of these can become a portfolio piece with a few hours of cleanup and documentation. A researcher analyzing survey data for a paper can publish the cleaning pipeline as a portfolio piece (with permission and de-identified data). A student training a model for a class can deploy it and write a README. The portfolio mindset turns every piece of work into a reusable asset instead of a disposable assignment.
Let us also address the fear of showing imperfect work. Many students keep their code private because they think it is not good enough. This is backwards. Nobody expects a student's portfolio to look like a senior engineer's production code. Reviewers evaluate work relative to experience. What they look for is trajectory: are you improving? Do you document your decisions? Do you acknowledge limitations? A project that says "the model overfits with limited data; here is what I tried and here is what I would do next" shows more maturity than a project that claims perfection. Honest limitations are a feature, not a bug. They signal that you can be trusted with real work, where limitations are everywhere.
Finally, consider the compounding visibility of a public portfolio. When your work is public and well-documented, opportunities find you. Recruiters search GitHub. Supervisors Google applicants. Community members share good blog posts. A student whose Kaggle notebooks are clean and whose project READMEs are clear becomes discoverable in a way that a private hard drive of assignments never achieves. You do not need to be famous or viral; you just need to be findable and impressive when found. That is the quiet power of a portfolio: it works while you sleep.
So the plan of this book is simple. We will not collect certificates. We will build a body of evidence: three substantial projects, documented to professional standards, hosted where the world can see them, explained in writing, tested in competition, extended through open source, and presented with confidence. By the final chapter, you will have not just skills but proof of skills — and that proof is what opens doors.
To make this concrete, imagine two applicants for a junior data analyst role at a mid-sized company. Applicant A lists six online certificates on her resume: data science, machine learning, deep learning, SQL, visualization, and cloud fundamentals. Her GitHub link leads to an empty profile. Applicant B lists two certificates — and a link to a portfolio site with three projects: an analysis of public transport delays in her city with an interactive dashboard, a deployed web app predicting used-car prices, and a blog post explaining how she debugged a data-leakage problem that had inflated her model's accuracy. The hiring manager spends five minutes on Applicant B's site, tries the car-price app, and reads the blog post. Applicant B gets the interview. This is not a hypothetical pattern — recruiters consistently report that a link to real work is the fastest way to stand out in a crowded applicant pool. Certificates get you past automated filters; portfolios get you the conversation.
It helps to understand the reviewer's workflow, because it tells you exactly what to optimize. A typical technical reviewer spends between three and ten minutes on a first pass. Minute one: the profile or portfolio site — is this person real, active, and professional? Minutes two to five: the best project — the README, the demo, the key result. If those minutes go well, the reviewer bookmarks you for a deeper look later: the code quality, the experiment log, the blog. If the first five minutes fail — no README, broken links, tutorial clones — there is no deeper look. This means your portfolio has a funnel: the top of the funnel (profile, pins, README hooks) must convert a skimmer into a reader, and the depth (code, docs, posts) must reward the reader who converts. Every chapter in this book serves one of these two jobs. Chapters 6 and 7 are funnel optimization; Chapters 3, 4, and 5 build the depth.
There is one more argument, and it is about time. Students often treat portfolio work as a cost — hours taken from study. Reframe it as an investment with compounding returns. A private assignment is used once (for a grade) and then depreciates to zero. A public portfolio piece is used many times: in job applications, in supervision meetings, as a code base for the next project, as material for blog posts, as evidence in scholarship applications. A single well-built project can serve you for years. And each new piece makes the older ones more valuable, because reviewers interpret a collection differently from isolated items: three related projects suggest a specialist; three diverse projects suggest versatility. Either reading is stronger than any single project alone. Build once, benefit repeatedly — that is the economics that makes the portfolio worth every hour.
For your research: Your thesis or dissertation is, in a sense, the ultimate portfolio piece — a large, documented body of work. Start treating it that way early. Keep your experiments in version-controlled repositories, write READMEs for your analysis code, and document your data pipelines as you go. When you later apply for postdoctoral positions or research roles, a supervisor who can browse your thesis repository — clean code, reproducible experiments, honest ablations — will trust your abilities far more than one who only sees the final PDF. Build the portfolio habit into your research workflow from day one.
Key takeaways: - A portfolio is verifiable evidence of skill; a certificate is an unverified claim. - Reviewers — employers and academic supervisors alike — judge you by what you have built, not what you have watched. - Building projects produces deeper learning than passive courses, because struggle teaches permanently. - Portfolio pieces are finished, documented, stranger-readable work — not raw assignments. - One excellent small project beats three unfinished large ones; completeness is the signal. - Reuse your existing coursework and research as raw material; the portfolio treatment is a few hours of cleanup. - Honest limitations and reflections increase trust; perfection claims decrease it. - A public portfolio compounds: it works for you around the clock and makes you discoverable.
Once you accept that a portfolio is the goal, the next question is the hardest one: what should I build? Students routinely make two opposite mistakes here. The first is building something trivially easy — a notebook that loads a famous dataset and runs a classifier with default settings — and calling it a project. The second is attempting something impossibly ambitious — "an AI that writes research papers" — and abandoning it halfway. Both mistakes come from the same source: choosing projects without a clear selection strategy. This chapter gives you that strategy.
Start with the three-audience test. Every portfolio project you build will be viewed by some combination of three audiences: employers, academic supervisors, and your future self. Employers ask: can this person solve practical problems with code? Supervisors ask: can this person do careful, honest, reproducible work? Your future self asks: can I understand what I did six months from now? A project that satisfies all three audiences is a good project. If it satisfies only one, think again. A flashy demo with no documentation impresses no supervisor. A meticulous analysis with no clear question bores every employer. Aim for the overlap.
Next, apply the problem-first principle. The most common failure mode in student portfolios is the technique-first project: "I learned convolutional neural networks, so I built an image classifier." Technique-first projects are generic — thousands of students have built the same MNIST or CIFAR-10 classifier, and reviewers recognize them instantly as tutorial clones. Problem-first projects invert this: start with a real question or need, then choose techniques to serve it. "I wanted to help my university's admissions office understand which factors predict student dropout, so I analyzed five years of enrollment data and built a model that flags at-risk students early." The second project is specific, motivated, and memorable. The technique is the same; the framing is everything.
Where do good problems come from? Look at your own life first. You are embedded in institutions and communities with real data problems: your department's course scheduling, your lab's experiment tracking, your campus's energy usage, your city's public transport, your family's small business inventory. These local problems have three advantages: you understand the context, you can talk to the people affected, and nobody else has solved them — so your project is original by construction. An original small project beats a copied large project in every review.
Your research interests are another rich source. If you are working on a thesis about air quality, a portfolio project analyzing public air-quality sensor data is both a portfolio piece and thesis groundwork. If your supervisor studies educational outcomes, a project visualizing school performance data serves double duty. This is the highest-leverage move in this book: choose portfolio projects that overlap with your research. You get a portfolio piece and research progress from the same hours of work. Supervisors notice this alignment, and it makes conversations about your work natural rather than forced.
Now let us talk about scope, because scope is where projects live or die. A good portfolio project should take two to six weeks of part-time work. Less than two weeks, and it is probably too shallow to show much. More than six weeks, and it risks becoming a second thesis — something you never finish and cannot document. The scope test is simple: can you describe the finished project in one sentence? "A web app that predicts house prices in Karachi from listing features." That is a well-scoped project. "An AI platform for real estate" is not — it is a product line, not a project. If your one-sentence description contains the word "platform," shrink the project.
Related to scope is the one clear skill rule. Each project should showcase one primary skill or competency, clearly. Project One shows data analysis and storytelling. Project Two shows modeling and deployment. Project Three shows deep learning or LLM work. Secondary skills appear naturally, but the primary signal should be unmistakable. This matters because reviewers skim. A reviewer spending three minutes on your portfolio should be able to say, after Project Two, "this person can deploy models." If a project tries to show everything — analysis, modeling, deep learning, deployment, a mobile app, and a paper — the reviewer concludes nothing clearly. Focus is a form of clarity.
There is also the question of dataset and data ethics. Your projects need data, and how you handle data says a lot about you. Prefer public, well-documented datasets for portfolio work: government open-data portals, competition datasets, research repositories. When you use them, cite them properly — dataset citation is part of research honesty and it impresses academic reviewers. If you collect your own data (surveys, scraping), document your collection method and respect the source's terms of service. Never publish private, sensitive, or identifiable data in a public portfolio. If your research data is sensitive, build the portfolio version on a public proxy dataset and note that the real analysis uses restricted data. This discipline — knowing what can be public and what cannot — is itself a professional signal.
Let us now design your personal portfolio blueprint. For the rest of this book, you will build three core projects, and this chapter helps you choose them. Here is a concrete planning exercise. Write down three columns: Problems I care about, Data I can access, and Skills I want to demonstrate. Fill each column with at least five items. Then look for intersections — a problem you care about, data you can actually get, and a skill you want to show. Those intersections are your candidate projects. A student interested in agriculture with access to public crop-yield data who wants to show deployment skills has just found Project Two. A student in public health with hospital open data who wants to show analysis skills has found Project One.
Consider also the narrative arc of your portfolio as a whole. Three disconnected projects are fine, but three projects that tell a story are better. The story might be a theme — "I work on problems in education" — with three projects at increasing sophistication: an analysis of exam data, a deployed model predicting at-risk students, and an LLM tutoring assistant. Or the story might be a progression — "I grew from analyst to engineer" — with each project showing a new capability. When a reviewer sees the arc, your portfolio reads as a career in miniature, and careers are what employers are buying.
A word of caution about trendy topics. It is tempting to build whatever is fashionable — last year it was chatbots, this year it is agents, next year something else. Trend-chasing produces portfolios that age badly and look identical to everyone else's. The antidote is not to avoid modern tools but to anchor them in real problems. An LLM project is impressive when it solves a real problem for a real user — say, a document question-answering tool for your department's handbook — and forgettable when it is a generic chatbot with a nice interface. The trend is the tool; the problem is the project. Reviewers remember problems.
Finally, be honest about your timeline. Map your three projects across your available months. If you have a thesis deadline in six months, do not plan three six-week projects back to back — plan one deep project that overlaps with your thesis and two lighter ones. A realistic plan you finish beats an ambitious plan you abandon. Write the plan down, with target completion dates, and revisit it monthly. The portfolio chapters ahead assume you will work on these projects in order, each building on the habits of the last: Project One teaches analysis and documentation, Project Two adds modeling and deployment, Project Three adds modern AI. By the end, the blueprint you design in this chapter becomes a body of work.
Just as important as knowing what to build is knowing what not to build. Here are the project types that consistently underwhelm reviewers. Tutorial clones: a notebook that follows a famous online tutorial step by step, with the same dataset and the same model, adds nothing — reviewers have seen it hundreds of times. If you start from a tutorial, you must diverge: different data, a new question, an extension. Kaggle copy-pastes: submitting someone else's public notebook as your own project teaches nothing and is easily detected. The eternal 10%: projects that are perpetually "almost done" — a repo with a grand vision in the README and three commits from eight months ago. An unfinished ambitious project signals poor scoping judgment. Black-box wrappers: projects that call an API and display the result with no understanding of what happens in between — a thin UI over someone else's model with no evaluation, no error handling, and no documentation of limitations. Data without permission: projects built on scraped or private data with no regard for terms of service or privacy. Each of these is avoidable, and avoiding them already puts you ahead of a large fraction of student portfolios.
Before investing weeks in a project, spend one focused day validating the choice. Work through this checklist. Data check: can you actually obtain the data today, legally, in a usable format? Download a sample and confirm it opens, has the columns you need, and covers the time period or population you need. Many projects die here — the dataset linked in a blog post turns out to be paywalled, deprecated, or far smaller than advertised. Feasibility check: can you describe the complete pipeline — from raw data to finished deliverable — in ten steps or fewer? If you cannot, the scope is still fuzzy. Differentiation check: search GitHub and Kaggle for similar projects. If you find close matches, identify exactly how yours differs — a new dataset, a harder question, a deployment, a better evaluation. Write that difference in one sentence; it becomes your project's positioning statement. Audience check: name one real person who would find the result useful — a shopkeeper, a teacher, a fellow student, your supervisor. If you cannot name anyone, the problem may be too abstract. Exit check: define what "done" looks like in advance — the deliverable, the metric, the documentation. Write it down. A project with a defined exit gets finished; one without drifts.
A practical scheduling note, since you are fitting this around coursework and research. Do not run all three projects in parallel — context-switching will stall all of them. Run them in sequence, and let each one fund the next: Project One's cleaning pipeline and visualization helpers become utilities you reuse in Project Two; Project Two's deployment setup becomes the template for Project Three's demo. Budget realistically: a "part-time" project means roughly 6–10 focused hours per week, so a four-week project is 25–40 hours of work. Block those hours on your calendar like lectures — non-negotiable appointments with yourself. And build in a documentation week at the end of each project: the README, the cleanup, the blog post, the profile update. Students who skip this week end up with three "done but undocumented" projects, which is nearly the same as three unfinished ones. The documentation week is part of the project, not an optional extra.
For your research: Choosing a portfolio project is structurally identical to choosing a research question: it must be important enough to matter, feasible enough to finish, and original enough to be yours. Use the same literature-scouting habit here — before committing to a project, spend an hour searching to see what exists. If ten identical projects are on GitHub, pick a different angle or a different dataset. That one hour of scouting is the portfolio equivalent of a related-work section, and it will save you from building something that looks derivative.
Key takeaways: - Apply the three-audience test: employers, supervisors, and your future self should all be satisfied by each project. - Be problem-first, not technique-first: start from a real question, then choose tools to serve it. - Mine your own life and research for original problems; local, specific problems beat generic tutorial clones. - Scope each project to 2-6 weeks of part-time work and describe it in one sentence — if you cannot, shrink it. - Each project should showcase one primary skill clearly; focus makes the reviewer's job easy. - Handle data ethically: use public data, cite sources, and never publish sensitive or identifiable information. - Design a narrative arc across your projects — a theme or progression that reads as a career in miniature. - Anchor trendy tools in real problems; the problem is the project, the tool is just the tool.
Your first portfolio project is an end-to-end data analysis: you take a raw, messy, real-world dataset, and you turn it into a clear, honest, well-communicated answer to a specific question. This is the foundation of everything that follows. If you cannot clean data, explore it carefully, and explain what you found, then no model you build later will be trustworthy — because every model sits on top of analysis. Employers know this; supervisors know this. A superb analysis project is the single most persuasive first piece in a portfolio.
Let us make this concrete with a running example we will develop through the whole chapter. Suppose you choose this question: How have urban air quality patterns in Karachi changed over the past five years, and which districts are most affected? You find a public dataset — perhaps from a government open-data portal or an environmental monitoring network — containing hourly readings of PM2.5, PM10, and other pollutants from several monitoring stations. This is a real problem, the data is public, and the question is specific enough to answer in a few weeks. Everything that follows applies equally to any domain: exam results, crop yields, hospital admissions, traffic counts.
Phase 1: Question and plan. Before touching the data, write a one-page project brief. State the question, why it matters, what data you will use, what you will deliver (a report? a dashboard? a notebook?), and what is out of scope. This brief becomes the opening of your README later. The discipline of writing it first prevents the most common analysis failure: wandering through data without a question, producing dozens of charts that answer nothing. Write the brief, commit it to your repository, and refer back to it when you are tempted to chase an interesting but irrelevant pattern.
Phase 2: Data acquisition and documentation. Download the data and immediately record its provenance: where it came from, when you accessed it, what the license allows, and what each column means. Create a data/ folder with two subfolders: data/raw/ for the untouched originals and data/processed/ for cleaned versions. Never modify raw data by hand — every transformation must live in code, so the whole pipeline is reproducible. Write a short data dictionary: a table listing each column, its type, its units, and any known issues. This takes an hour and signals professional-grade discipline. Reviewers who see a data dictionary know they are dealing with someone careful.
Here is the folder structure for the project:
air-quality-analysis/
├── README.md
├── requirements.txt
├── data/
│   ├── raw/                 # untouched originals, never edited by hand
│   └── processed/           # cleaned outputs of the pipeline
├── notebooks/
│   ├── 01-data-exploration.ipynb
│   ├── 02-cleaning.ipynb
│   └── 03-analysis.ipynb
├── src/
│   ├── __init__.py
│   ├── load_data.py         # download + provenance logging
│   ├── clean.py             # reproducible cleaning pipeline
│   └── visualize.py         # reusable plotting functions
├── reports/
│   └── figures/             # exported charts used in the write-up
└── environment.yml          # or requirements.txt
Phase 3: Cleaning — the unglamorous majority. In real analysis, cleaning takes most of the time, and your portfolio should show that you take it seriously. Work through the data systematically: check for missing values and decide, column by column, whether to drop, impute, or flag them — and document each decision with a reason. Look for duplicates, impossible values (negative pollutant concentrations, timestamps in the future), and inconsistent categories (the same district spelled three ways). Check units and time zones. For our air-quality example, you might discover that one station stopped reporting for six months, that another station's sensor drifts after calibration, and that timestamps mix two time zones. Each discovery goes into the cleaning notebook with a short note explaining what you found and what you did about it. This notebook — the honest record of data problems and your responses — is often the most impressive artifact in the project, because it shows judgment.
Phase 4: Exploratory analysis. Now explore with your question as the compass. Compute summary statistics per station and per year. Plot distributions to see the shape of the data. Plot time series to see trends and seasonality — in Karachi, you would expect winter months to show worse air quality, and the data should either confirm or challenge that expectation. Compare districts. Look for outliers and investigate them before deciding what to do with them: an extreme reading might be a sensor malfunction or a genuine dust storm, and the difference matters. Use visualization generously but purposefully — every chart should answer a sub-question, and every chart needs labeled axes, units, and a title that states the finding, not just the topic. "PM2.5 worsens every winter, peaking in January" is a title; "PM2.5 by month" is a label.
Phase 5: Answering the question. With clean data and a solid exploration behind you, answer the original question directly and quantitatively. For our example: compute the five-year trend per district with appropriate statistics, identify the most affected districts with confidence intervals, and test whether the winter pattern is statistically significant. Be precise about what the data can and cannot say. If one district has no monitoring station, say so — do not interpolate silently. If the data covers only weekdays, say so. Honest scoping of conclusions is what separates analysis from storytelling-with-numbers, and supervisors in particular watch for it.
Phase 6: The write-up. The final deliverable is a report — this can be the README plus a well-organized notebook, or a short PDF report. Structure it like a miniature paper: question, data, methods, results, limitations, conclusion. Include your key figures with captions that explain what the reader should see. State limitations plainly: what would you do with more time, better data, or different methods? This section is where many students undersell themselves — they treat limitations as confessions of failure. They are the opposite: they are proof that you understand your own work, which is the rarest and most valuable quality in a junior analyst.
A note on tools: use whatever you know well — Python with pandas and matplotlib is the standard choice and the one employers expect, as documented in the standard references for data analysis work [2]. Jupyter notebooks are excellent for exploration and for the final narrative, but keep reusable logic in src/ scripts, because notebooks with hidden state and out-of-order execution are a reproducibility hazard. Pin your package versions in requirements.txt. A reviewer should be able to clone your repository, install dependencies, and reproduce your results. Test this yourself in a fresh environment before you publish — it is the single most common embarrassment in portfolio projects, and it is entirely avoidable.
Finally, a word on originality checks. Before you publish, search for similar analyses of your dataset. If someone has already published a thorough analysis, differentiate: ask a different question, use a different method, or extend the time range. You do not need to be the first to touch a dataset; you need to add something. A short "related work" paragraph in your README — "X analyzed this data for Y; this project extends it by Z" — shows research maturity and preempts the reviewer's "isn't this just a copy?" reaction.
Let us zoom into Phase 3 with concrete decisions from our air-quality example, because this is where reviewers form their opinion of your judgment. Missing values: Station North is missing 18% of its hourly readings, mostly in 2021. You investigate and find the station was offline for maintenance that year — the missingness is informative, not random. Decision: do not impute; analyze Station North separately for 2022–2025 and note the gap. Imputing would have fabricated a fifth of the record. Impossible values: 47 readings show negative PM2.5 concentrations — physically impossible, clearly sensor errors. Decision: remove them, and log the count and the date range in the cleaning notebook. Inconsistent labels: the district column contains "Gulshan", "gulshan-e-iqbal", and "Gulshan-e-Iqbal" — the same place spelled three ways. Decision: normalize to one canonical name with a mapping table committed to the repo. Timezone mix: timestamps before 2023 are in UTC, after 2023 in local time — discovered by plotting and noticing a five-hour jump at the boundary. Decision: convert everything to one timezone in code, with a comment explaining the discovery. Each of these is a small detective story, and the cleaning notebook telling these stories is the most human, most impressive part of the project. It shows you do not just run functions — you think.
A common failure in student analyses is the "chart dump": thirty plots with no narrative, each titled by its variables. Treat every figure as an argument in your case. Before making a chart, write the sentence it should support: "Winter months show PM2.5 levels roughly double those of summer." Then design the chart to make that sentence obvious — monthly boxplots ordered by month, winter months highlighted, a reference line at the health guideline threshold. After making it, check: can a reader get the sentence from the chart in five seconds? If not, redesign. This discipline — sentence first, chart second — transforms visualization from decoration into evidence. Also respect the basics that professionals check instantly: axes labeled with units, legends that explain encodings, color choices readable by colorblind viewers, and no misleading truncated axes. A reviewer who sees careful, honest charts trusts the analysis behind them.
You do not need advanced statistics for a strong analysis project, but you need enough to avoid fooling yourself and your reader. Report uncertainty wherever you report an estimate: means with confidence intervals, trends with significance tests, comparisons with appropriate tests rather than eyeballing. When you claim "District A is more polluted than District B," back it with a test and report the p-value and the effect size — a statistically significant difference of 2% may not be practically meaningful, and saying so shows sophistication. Watch for the classic traps: comparing averages across groups with wildly different sample sizes, ignoring seasonality when computing trends, and mistaking correlation for causation in the write-up ("pollution rises when traffic rises" is fine as an observation; "traffic causes the pollution rise" needs far more evidence). A short "statistical notes" section in your report, explaining which tests you used and why, signals to academic reviewers that you understand what your numbers mean.
Your analysis will be read by different people with different needs, so package it in layers. The README is the executive summary: question, key finding, one hero chart, and how to reproduce. The guided notebook is the fifteen-minute tour for the interested reviewer. The full report (PDF or long-form markdown) is the complete record for the thorough reader — every method, every chart, every caveat. The raw code and data pipeline is the evidence locker for the skeptic who wants to verify. This layered packaging respects everyone's time: the skimmer gets the answer in a minute, the evaluator gets the story in fifteen, and the deep reader gets everything. It also mirrors how research is communicated — abstract, talk, paper, supplementary materials — so building this habit now trains you for academic publishing later. One analysis, four layers, every audience served.
For your research: This chapter is a rehearsal for your thesis methodology chapter. The habits are identical: provenance documentation, reproducible cleaning code, exploratory plots that justify modeling choices, and honest limitation sections. If you build this project on data adjacent to your thesis topic, you can literally reuse the cleaning pipeline and the visualization functions in your research — and you will arrive at your thesis experiments with tested, working code instead of starting from scratch.
Key takeaways: - An end-to-end analysis is the foundation project: every model you build later depends on these skills. - Write a one-page brief before touching data; a question-first analysis avoids aimless chart-making. - Keep raw data untouched and every transformation in code; reproducibility is non-negotiable. - Document cleaning decisions individually — the cleaning notebook shows judgment, which reviewers prize. - Every chart needs a finding as its title, labeled axes, and units; purposeful visualization beats volume. - Scope your conclusions honestly; stating what the data cannot say is a mark of maturity. - Deliver a report structured like a miniature paper, with a real limitations section. - Pin dependencies and test reproducibility in a fresh environment before publishing.
Project Two takes you from analysis to prediction — and, crucially, from a notebook on your laptop to a working application on the internet that anyone can use. This is the project that most clearly separates a portfolio from a pile of coursework. Anyone can train a model in a notebook. Far fewer people can wrap that model in a web application, deploy it, and hand a reviewer a URL. That URL — a live demo — is worth more than a hundred lines of claims on a resume, because it is the difference between saying you built a model and proving it works.
Our running example: a house-price prediction app for Karachi. The question is concrete — given a listing's features (area, bedrooms, location, age), what is a fair price estimate? — the data exists on public listing aggregators and open datasets, and the deliverable is obvious: a web page where you enter features and get a prediction. Notice the problem-first framing from Chapter 2: this is not "I learned regression," it is "I built a tool that helps buyers spot overpriced listings."
Phase 1: Problem framing and data. Start exactly as in Project Three's predecessor: a brief, a dataset with documented provenance, and a cleaning pipeline. But now your brief must also define the prediction task precisely: what is the target variable, what are the features, and — critically — what does a useful prediction look like to the end user? For the price app, the user cares about a price range, not a point estimate to the rupee, so you might present the prediction as a range. Defining the task from the user's perspective is a product skill, and it is what makes deployed projects impressive.
Phase 2: Baseline first. Before any fancy modeling, build the simplest possible baseline: predict the median price for everything, or fit a plain linear regression. Record its error. This baseline is your anchor — every subsequent model must beat it, and the comparison is what makes your results meaningful. Students often skip baselines and report a single accuracy number that means nothing in isolation. Reviewers, especially academic ones, will ask "compared to what?" Have the answer ready. The baseline also protects you from a nasty surprise: sometimes the simple model is nearly as good as the complex one, and knowing that is itself a valuable finding.
Phase 3: Modeling with discipline. Now build real models — but with experimental discipline. Split your data properly: train, validation, and test sets, or cross-validation, with the test set locked away until the end. The single most common student error is data leakage — letting information from the test set influence training, through imputation, scaling, or feature selection done on the full dataset. Leakage produces flattering metrics that collapse in the real world, and experienced reviewers can often smell it. Prevent it structurally: do all preprocessing inside a pipeline that is fit only on training data. Tune hyperparameters on the validation set, not the test set. Evaluate with metrics that match the user's need — for prices, mean absolute error in rupees is more interpretable than R-squared. And always compare against your baseline.
A realistic modeling log for our example might read: baseline median predictor (MAE 4.2M PKR), linear regression (MAE 3.1M), random forest (MAE 2.4M), gradient boosting with tuned hyperparameters (MAE 2.1M on the held-out test set). Each step is a commit, each experiment is logged with its configuration and result. This log — boring, methodical, honest — is the heart of the project. It shows you understand that machine learning is an experimental science, not a magic function. The standard references on applied machine learning emphasize exactly this workflow of baseline, iteration, and honest evaluation [1].
Phase 4: The application. Now wrap the trained model in a web application. For a portfolio project, a lightweight Python web framework is ideal: the application loads your saved model, presents a form for the input features, and displays the prediction. Keep it simple and robust — a clean form, a clear result display, input validation (what happens if someone enters a negative area?), and a short explanation of what the model does and its limitations. You do not need a beautiful design; you need a working, understandable tool. Save the trained model as a file (a serialized artifact) so the app loads it rather than retraining on startup, and keep the training code separate from the serving code.
Folder structure:
house-price-predictor/
├── README.md
├── requirements.txt
├── app.py                   # the web application
├── train.py                 # training script: data → model artifact
├── models/
│   └── model.pkl            # serialized trained model (+ metadata)
├── data/
│   ├── raw/
│   └── processed/
├── notebooks/
│   ├── 01-exploration.ipynb
│   └── 02-modeling.ipynb    # experiments, baseline comparisons
├── src/
│   ├── features.py          # feature engineering (shared train/serve)
│   └── evaluate.py
├── tests/
│   └── test_app.py          # at least smoke tests for the app
└── templates/               # HTML templates if not a single-file app
Phase 5: Deployment. Deploy the app to a free hosting platform so it has a public URL. The specifics change over time, but the principle does not: a stranger should be able to open the link and use your model without installing anything. Document the deployment steps in your README so you — or anyone — can redeploy. Then test the live app yourself: try edge cases, check loading times, and make sure it does not crash on bad input. A deployed app that crashes on the reviewer's first try is worse than no app at all, so this testing is not optional.
There is an important subtlety here: reproducibility of the model artifact. Your repository should contain everything needed to reproduce the trained model from raw data: the training script, the pinned dependencies, and ideally a fixed random seed. The deployed app serves a saved artifact for speed, but the artifact must be regenerable. A reviewer who cannot see how the model was produced will not trust the demo, no matter how slick it looks.
Phase 6: Honest evaluation and limitations. Your README and app should both state what the model can and cannot do. What data was it trained on, and how old is that data? For which neighborhoods does it perform poorly? What happens when the market shifts? A short "model card" section — intended use, training data, performance metrics, limitations, and ethical considerations — is the professional standard, and writing one shows you take deployed AI seriously. For a price predictor, the ethical note matters: an inaccurate estimate could affect real financial decisions, so the app should present predictions as estimates with uncertainty, not as facts.
Let us address the most common failure mode of this project: the model that works in the notebook but breaks in the app. This almost always comes from training-serving skew — the features computed at serving time differ subtly from those at training time. The structural fix is to share the feature-engineering code between training and serving: one features.py module imported by both train.py and app.py, never duplicated logic. Write a test that feeds the same raw input through the training pipeline and the serving path and asserts identical features. This single test prevents an entire class of embarrassing bugs, and its presence in your repository signals engineering maturity.
Here is what the modeling log for the house-price project might actually look like — this is the artifact reviewers love to see, because it shows thinking over time:
| # | Experiment | Validation MAE | Test MAE | Notes |
|---|---|---|---|---|
| 0 | Median baseline | 4.2M PKR | — | Anchor: every model must beat this |
| 1 | Linear regression, raw features | 3.4M | — | Underfits; location dummies help little |
| 2 | Linear regression + engineered features (price per sq ft by district) | 3.1M | — | Feature engineering beats fancier models so far |
| 3 | Random forest, default settings | 2.7M | — | Big jump; overfits slightly on old listings |
| 4 | Random forest + time-based validation split | 2.9M | — | Honest split hurts — good, it was leakage before |
| 5 | Gradient boosting, tuned via random search | 2.4M | — | Best so far; diminishing returns setting in |
| 6 | Gradient boosting + calibrated uncertainty range | 2.4M | 2.1M | Final: test set unlocked once, reported honestly |
Notice experiment 4: the score got worse when the validation was fixed, and that is recorded proudly, not hidden. That single row tells a reviewer more about your competence than the final 2.1M figure does. Keep this log as a markdown file or a simple spreadsheet in the repo, updated with every experiment. It is the laboratory notebook of machine learning, and its presence separates professionals from hobbyists.
In most real projects, feature engineering — creating informative inputs from raw data — matters more than model selection, and it is where your subject-matter knowledge becomes an advantage. For house prices: price per square foot by district captures neighborhood premiums; distance to the city center captures location value; listing age captures market staleness; the ratio of bedrooms to area captures layout efficiency. Each feature encodes a hypothesis about the world, and documenting those hypotheses ("we expect distance to center to matter because…") shows you are modeling a real phenomenon, not just fitting curves. Try features one group at a time and measure their impact on validation error — this is the same ablation discipline researchers use. And beware leakage in features: a feature like "days until sold" is only known after the sale — it cannot be used to predict the price beforehand. Leakage through features is the subtlest and most common form, and reviewers specifically look for it.
Before you share the deployment URL with anyone, put the app through this gauntlet. Input validation: enter negative areas, zero bedrooms, absurd values (a 10-million-square-foot apartment), and non-numeric text — the app must handle all of these gracefully with clear messages, never a crash or a traceback. Consistency: the same input twice gives the same output (check your random seeds and caching). Performance: the prediction returns in a few seconds; if model loading is slow, load once at startup. Mobile check: open it on a phone — a surprising fraction of reviewers will — and confirm the form is usable. Fresh-eyes test: ask a friend to use it with no explanation and watch where they get confused; fix those spots. Write the key checks as automated tests in tests/ so they run on every change. An app that survives this gauntlet is genuinely demo-ready, and the tests in the repo prove it.
For your research: Every thesis that includes a predictive model can benefit from this chapter's discipline: a locked test set, a baseline, an experiment log, and a model card. Even if your research model never becomes a web app, package it as if it could be — a training script, a saved artifact, and a one-page model card in your thesis repository. When your supervisor or an external examiner asks how the model was evaluated, you will hand them the experiment log instead of reconstructing it from memory. That is the difference between defensible research and hopeful research.
Key takeaways: - A deployed model with a public URL is the strongest single proof in a junior portfolio. - Define the prediction task from the user's perspective before choosing models. - Always build a simple baseline first; report every model compared against it. - Prevent data leakage structurally: fit all preprocessing inside pipelines on training data only. - Share feature-engineering code between training and serving to eliminate training-serving skew. - Keep the app simple, validate inputs, and test the live deployment with edge cases. - Make the model artifact regenerable from raw data with pinned dependencies and fixed seeds. - Write a model card: intended use, training data, metrics, limitations, and ethical notes.
Your third core project shows that you can work with the tools defining modern AI: deep learning, or large language models. You do not need to train a foundation model from scratch — nobody expects that from a student portfolio, and attempting it would be a poor use of your time. What reviewers want to see is that you can use modern AI responsibly and effectively: fine-tune or prompt a model for a real task, evaluate it honestly, and document what you built. This project completes your portfolio's arc — analysis, classical machine learning, and now modern AI — and it is the piece most likely to catch an employer's eye, because these are the skills job postings ask for today.
Let us set up the same structure as before: a real problem, a concrete deliverable. Running example: a document question-answering assistant for your university department. Students and new faculty constantly ask the same questions — what are the thesis submission deadlines? which courses count toward the AI specialization? who supervises computer vision theses? — and the answers live scattered across handbooks, web pages, and notice boards. Your project: an application where a user asks a question in plain language and gets an answer grounded in the department's actual documents, with citations to the source pages. This is a retrieval-augmented generation (RAG) application — one of the most practical LLM patterns — and it is genuinely useful.
Choosing your path: deep learning or LLM? Both are valid; choose based on your interests and resources. A deep learning path might be an image classifier for a domain you care about — say, classifying crop diseases from leaf photos using a pre-trained convolutional network, fine-tuned on a public plant-disease dataset. The LLM path, as in our example, uses an existing language model through an API or an open-weight model, combined with your own retrieval and evaluation code. The LLM path generally needs less compute and less training time, which makes it the pragmatic choice for most students. The deep learning path teaches more about model training itself. Either way, the portfolio value comes from the same things: a real task, honest evaluation, and clear documentation.
Phase 1: Scoping an LLM application. The biggest risk in LLM projects is vagueness — "a chatbot that answers questions" is not a project. Scope it tightly: which documents, which questions, which users, and what counts as a good answer. For the department assistant: the corpus is the student handbook, the course catalog, and the faculty pages; the users are new MS students; a good answer is accurate, cites its source document, and says "I don't know" when the documents do not contain the answer. That last criterion — graceful abstention — is what separates a serious project from a demo. Write these criteria down before you build anything; they become your evaluation rubric later.
Phase 2: Building the pipeline. A RAG application has understandable components, and your portfolio should show each one: document ingestion (loading and chunking the handbooks), embeddings (converting chunks to vectors), a vector store for retrieval, the retrieval step itself, prompt construction, and the language model call. Build it as clean, modular code — one module per component — so a reviewer can follow the data flow. Start with the simplest version that works end to end, then improve components one at a time. Log your design decisions: why this chunk size, why this many retrieved passages, why this prompt template. These decisions are the engineering content of the project, and documenting them shows you are not just calling an API blindly.
Folder structure:
dept-qa-assistant/
├── README.md
├── requirements.txt
├── app.py                   # web interface: ask a question, get a cited answer
├── src/
│   ├── ingest.py            # load + chunk documents
│   ├── embeddings.py        # embedding logic
│   ├── retriever.py         # vector store + retrieval
│   ├── prompts.py           # prompt templates (versioned, documented)
│   └── evaluate.py          # evaluation harness
├── data/
│   └── corpus/              # the department documents (or a manifest)
├── eval/
│   └── test_questions.json  # 30-50 questions with expected answers/sources
├── notebooks/
│   └── 01-retrieval-experiments.ipynb
└── docs/
    └── model-card.md        # model card: capabilities, limits, costs
Phase 3: Evaluation — the part most students skip. An LLM demo without evaluation is a toy; an LLM application with evaluation is a project. Build a test set of 30 to 50 realistic questions with known correct answers and the source documents that support them. Then measure: how often does the system retrieve the right document? How often is the final answer correct? How often does it hallucinate — stating something not supported by the retrieved documents? Run this evaluation every time you change the pipeline, and keep a log of scores. This is the exact discipline from Chapter 4's modeling experiments, applied to LLMs. When your README reports "the system answers 82% of test questions correctly and abstains on 9%, with manual review finding no hallucinations in the sampled outputs," you sound like an engineer, not an enthusiast. Reviewers — especially academic ones — will notice the difference immediately.
Phase 4: Responsible documentation. LLM projects carry specific responsibilities that your documentation must address. State which model you used and its known limitations. Document your prompt templates — they are part of the system, not incidental details. Address privacy: what happens to user questions? Are they sent to an external API? If so, say so plainly, and note that users should not enter sensitive information. Address cost: how much does each query cost, and what would it cost at scale? Address failure modes: what does the system do when documents are missing, when the question is ambiguous, or when the model is uncertain? A short "responsible use" section in your README covering these points shows a maturity that is rare in student work and highly valued by both employers and supervisors.
The deep learning alternative. If you choose the deep learning path instead, the same principles apply with different mechanics. Use transfer learning — start from a pre-trained model and fine-tune it on your task — because training from scratch on a student-scale dataset is rarely the right call, and knowing that is itself a sign of good judgment. Split your data carefully, watch for overfitting with proper validation curves, and use data augmentation thoughtfully. Document your training configuration completely: architecture, hyperparameters, training time, hardware, and final metrics with confidence intervals. Save your training curves as figures. The standard deep learning references document these practices in detail [1]. And write the same model card: what the model is for, what data it saw, where it performs well, and where it fails.
A note on compute and cost. Students often assume deep learning or LLM projects require expensive resources. They usually do not. Fine-tuning a small classifier can run on free cloud notebook GPUs. LLM API costs for a portfolio-scale project — a few hundred test queries — are typically a few dollars at most, and many providers offer free tiers. Open-weight models can run locally for small-scale demos. Document your compute setup and costs honestly in the README; resourcefulness under constraints is an attractive signal, and it preempts the assumption that your project only worked because of expensive infrastructure.
Presenting the demo. Like Project Two, this project should have something a reviewer can try: a simple web interface where they ask a question and see the answer with its cited sources. The interface should also show its work — which documents were retrieved, and the model's confidence or abstention. Showing the retrieval step is both honest and educational: it demonstrates that you understand the system is retrieval plus generation, not magic. Record a short demo video or GIF for the README as well, so reviewers who do not want to run the app can still see it working in thirty seconds.
Let us make the evaluation harness concrete for the department Q&A assistant. You assemble 40 test questions covering the real categories users ask: deadlines ("When is the thesis proposal due for spring intake?"), requirements ("Which courses count toward the AI specialization?"), people ("Who supervises computer vision theses?"), procedures ("How do I apply for a lab assistant position?"), and trick questions whose answers are not in the documents ("What is the hostel fee?" — deliberately absent, to test abstention). For each, you record the expected answer and the source document and page. Then you run the pipeline and score three things. Retrieval accuracy: for how many questions was the correct document among the top-3 retrieved chunks? Say 35/40 (87.5%). Answer correctness: how many final answers were fully correct? Say 31/40 (77.5%). Abstention behavior: on the 5 unanswerable questions, did the system correctly say it did not know? Say 4/5, with one hallucinated answer — which you then fix by strengthening the prompt's abstention instruction, re-run, and log the improvement. This table of numbers, with the failure analysis, is the most persuasive part of the project. It says: this person built a system and knows how well it works, including where it fails.
Your prompts are part of the system, so treat them as code: versioned, documented, and tested. Keep prompt templates in src/prompts.py with comments explaining each instruction's purpose — the role definition, the citation requirement, the abstention rule, the output format. When you change a prompt, note what changed and why in your experiment log, and re-run the evaluation set to measure the effect. This discipline prevents the most common LLM project failure: a prompt that "worked once" and then silently degrades as other components change. Also document your prompt design decisions: why you ask for citations in a specific format, why the abstention instruction is phrased the way it is, what happens with ambiguous questions. A reviewer reading your prompts file should be able to reconstruct your reasoning. Prompt engineering done this way is software engineering, not incantation — and presenting it that way is what impresses technical reviewers.
Every LLM application has operating costs and speed characteristics, and documenting them shows you think like someone who ships real systems. Measure and report: average cost per query (embedding + generation), average latency end to end, and what those imply at scale (100 queries a day? 10,000?). For a portfolio project the numbers will be small — a few cents per query, a few seconds of latency — and that is fine; the point is that you measured. Also prepare for demo failure: live demos of LLM apps can be slow or hit rate limits at the worst moment. Mitigate by pre-computing answers for your walkthrough questions (with a note that they are cached examples), keeping the evaluation table as a static artifact, and having the demo video as backup. A presenter who says "the live app is running, and here is a recorded walkthrough in case of network issues" looks prepared, not pessimistic.
For your research: The evaluation harness you build here — a fixed test set, automated scoring, a log of results across pipeline versions — is directly reusable in thesis research involving LLMs or any experimental system. Too many researchers evaluate their systems ad hoc, tweaking prompts and eyeballing outputs. A researcher who arrives with a versioned evaluation set and a results log is already operating at publication standard. If your thesis touches LLMs, this project can become your thesis's evaluation infrastructure.
Key takeaways: - You do not need to train a foundation model; using modern AI well — with evaluation and documentation — is the portfolio signal. - Scope LLM applications tightly: specific documents, specific users, and explicit criteria for a good answer. - Build RAG (or deep learning) pipelines as clean, modular components with logged design decisions. - Evaluation is what turns a demo into a project: a fixed test set, measured accuracy, retrieval quality, and hallucination checks. - Document responsibilities specific to LLMs: model limitations, prompt templates, privacy, cost, and failure modes. - Prefer transfer learning and free-tier compute; document your setup and costs honestly. - Show the system's work in the demo — retrieved sources, confidence, abstention — not just the final answer.
You have built three substantial projects. Now comes the step that determines whether anyone understands them: the README. Here is an uncomfortable fact about portfolios: most reviewers will never run your code. They will read your README, skim your repository structure, maybe glance at a notebook — and form their judgment in under five minutes. The README is therefore not documentation in the bureaucratic sense; it is the pitch, the tour guide, and the instruction manual for your work. A brilliant project with a poor README is an undiscovered project. A good project with an excellent README gets interviews.
Think about the README's job from the reviewer's perspective. She has opened your repository link from your resume. She knows nothing about your project. In the first thirty seconds, she needs to answer: what is this, and why should I care? In the next two minutes: what did this person actually do, and did it work? And if she is impressed: how do I run this myself? Your README must serve all three readers — the thirty-second skimmer, the two-minute evaluator, and the motivated runner — in that order. Most student READMEs fail because they are written for none of them: they are either empty ("my ML project") or a disorganized dump of everything the student did.
The structure that works is a story in five acts. Act 1: The hook. Open with one or two sentences stating the problem and what you built — not the technique, the outcome. "A web app that estimates fair house prices in Karachi from listing features, so buyers can spot overpriced listings." Compare that with "This project implements gradient boosting regression on the Karachi housing dataset." The first makes a reviewer want to read on; the second makes her reach for the back button. Follow the hook with a screenshot or demo GIF and the live demo link if you have one. Visual proof in the first screen is the highest-value real estate in your portfolio.
Act 2: The story. A few short paragraphs: what problem motivated this, what data you used, what approach you took, and what the result was — including the key number. "Trained on 12,000 listings from 2020–2025, the gradient boosting model achieves a mean absolute error of 2.1M PKR on a held-out test set, beating the median-price baseline of 4.2M." Notice what this does: it gives the reviewer the complete narrative arc without requiring her to read code. Use plain language; save jargon for the methods section. If your grandmother could not follow the gist, simplify.
Act 3: The evidence. This is where you show your work compactly: a table of model comparisons, your best two or three figures with explanatory captions, and a link to the full report or notebook. Do not paste twenty charts into the README — curate. The README is a gallery, not a warehouse. Each figure should earn its place by communicating one finding. And include the honest numbers, including baselines and limitations. A results section that only shows the best metric looks like marketing; a results section that shows the full comparison looks like science.
Act 4: How to run it. Precise, tested, step-by-step instructions: prerequisites, installation commands, how to reproduce the results, how to launch the app. Number the steps. Include the exact commands in code blocks so they can be copied. State the expected runtime and any costs. Then — and this is the step almost everyone skips — actually test these instructions in a fresh environment before publishing. Clone the repo to a new folder, follow your own steps, and fix everything that breaks. A "quickstart" that does not work is worse than no quickstart, because it tells the reviewer your project is not really reproducible.
Act 5: What you learned and what is next. Close with honest reflection: the hardest part, what you would do differently, known limitations, and future improvements. This section does double duty: it shows maturity, and it gives interviewers perfect material to ask you about (which is exactly what you want — questions you can answer brilliantly because you wrote the answers). It also protects you: a limitation you state yourself cannot be used against you, while one the reviewer discovers feels like concealment.
Here is a README outline you can reuse for every project:
# Project Title — one-line outcome statement

[Demo link] | [Video/GIF] | [Full report]

## The problem
2-3 sentences: who has this problem, why it matters.

## What I built
2-3 sentences: the deliverable and the key result with numbers.

## How it works
Short architecture/method overview; link to details.

## Results
Comparison table + 2-3 captioned figures.

## How to run it
1. Prerequisites
2. Install (exact commands)
3. Reproduce results (exact commands)
4. Launch the app (exact commands)

## Project structure
Annotated folder tree.

## Limitations and future work
Honest list.

## What I learned
3-5 bullets of genuine reflection.

## Data sources & credits
Citations, licenses, acknowledgments.
Beyond structure, sweat the small things that signal professionalism. Use proper markdown formatting: headers, code blocks with language tags, tables where they help. Keep lines and sections short — walls of text do not get read. Check spelling and grammar; sloppy writing in a README suggests sloppy thinking in code. Keep the README current: when you improve the project, update the README the same day, or it will lie to readers within weeks. And write for an international reader: avoid slang, explain local context (a reviewer in another country does not know Karachi's neighborhoods — a one-line note helps), and use standard units.
One more powerful technique: the guided tour notebook. Alongside the README, keep one notebook that walks a reader through the project end to end in fifteen minutes: the question, a glimpse of the raw data, the key cleaning decisions, the two most important charts, the model comparison, and the conclusion — with narrative text between code cells doing the explaining. This is the artifact you link when someone asks "can you show me the project?" It respects the reader's time while showing the full pipeline. Writing it also forces you to identify what actually mattered in the project, which sharpens your own understanding.
Finally, remember that README writing is a transferable research skill. A good README and a good paper abstract do the same job: orient a stranger quickly, state the contribution, and point to the evidence. A good methods section and a good "how to run it" do the same job: enable reproduction. Every hour you spend making your READMEs excellent is an hour spent practicing scientific communication. Supervisors who read your repositories will recognize the skill, even if they never comment on it directly.
To feel the difference, compare two versions of the same project's README opening. Before — the typical student version: "This is my machine learning project for the AI course. I used Python and scikit-learn to predict house prices. The dataset is from Kaggle. Accuracy is 89%." A reviewer learns almost nothing: which houses? what does 89% mean for a regression task? can I try it? After — the five-act version: "A web app that estimates fair house prices in Karachi from listing features — enter area, bedrooms, and district, get an estimated price range. Built on 12,000 listings (2020–2025); gradient boosting achieves 2.1M PKR mean absolute error on a held-out test set, halving the 4.2M baseline. [Try the live demo] [Watch 60-sec video]." Same project, same student — but the second version earns the next four minutes of the reviewer's attention, and the first earns the back button. The transformation took about three hours: writing the story, capturing the screenshot, recording the GIF, testing the install steps. Three hours, and the project's perceived value multiplies. That is the return on investment of README work, and it is the highest-ROI activity in this entire book.
Before publishing or linking a README anywhere, run through this checklist. First screen: does the first screen (before scrolling) contain the one-line outcome, a visual, and the demo link? Story: can a non-technical reader understand the problem and result? Numbers: are key results stated with context — baselines, test setup, units? Reproducibility: are install and run instructions exact, numbered, and tested fresh? Structure: is the project tree annotated so a reader knows where things live? Honesty: are limitations stated plainly, with future work? Freshness: does every claim match the current code — no screenshots of an old UI, no metrics from a deprecated model? Links: do all links work — demo, video, report, data source? Tone: is it professional and plain — no slang, no hype ("revolutionary", "state-of-the-art" for a student project invites skepticism)? A README that passes this checklist is rarer than you think, which is exactly why it stands out.
Not every repository is a project — adapt the structure. A Kaggle notebook repo needs a shorter README: the competition, your rank, your approach in a paragraph, and the key lesson — the notebook itself is the document. An open-source contribution does not need a README at all, but your portfolio site's entry about it should follow the story structure: what the project is, what you changed, the PR link, what you learned. A tutorial or blog companion repo needs a README that orients: what the tutorial teaches, prerequisites, and how the code maps to the post's sections. A dataset repo needs provenance, license, data dictionary, and citation instructions. The principle is constant — orient the stranger in five minutes — but the emphasis shifts with the artifact. Learning to write the right document for each artifact type is itself a professional communication skill.
A README is not written once — it evolves with the project, and managing that evolution is part of the craft. When you improve the model, add a changelog section noting what changed and when: "2026-09: retrained on 2025 listings; MAE 2.1M → 1.9M; see experiment #12." This does two things: it keeps the README honest (stale claims are the most common README failure), and it shows the reviewer that the project is alive and improving — a signal of sustained engagement that a static document cannot give. For significant versions, tag releases in git and note the tag in the README, so a reader can reproduce the exact results quoted. And when you retire a project, say so at the top: "Archived — complete as of 2026; demo may be offline." An archived note is professional; a silently dead demo link is not. Treat the README with the same version discipline as the code, because to the reviewer, the README is the project until proven otherwise.
For your research: Treat your thesis repository's README as the abstract of your thesis code. When an external examiner or a future collaborator opens it, they should understand your research question, your data, your methods, and how to reproduce your key results — all within five minutes. Write it early, not the week before submission: a README written alongside the research stays honest, while one written at the end becomes fiction. The five-act structure in this chapter works for thesis READMEs with almost no modification.
Key takeaways: - Most reviewers never run your code; the README is the pitch, tour guide, and manual — write it for the five-minute reader. - Open with the problem and outcome, not the technique; put visual proof and the demo link in the first screen. - Structure the README as a five-act story: hook, narrative, evidence, run instructions, reflection. - Curate evidence: a comparison table and two or three captioned figures beat twenty dumped charts. - Test your own installation instructions in a fresh environment; a broken quickstart destroys trust. - Close with honest limitations and learnings — they show maturity and give interviewers material you can answer well. - Sweat the small things: formatting, spelling, currency of the document, and writing for an international reader. - README writing is paper-abstract writing; the skill transfers directly to research communication.
GitHub is where your portfolio lives, and your GitHub profile is the first thing a technical reviewer sees. Think of it as a resume that updates itself and provides evidence on demand. But most student profiles actively hurt them: a dozen forked repositories with no original work, tutorial repos named "test123," empty READMEs, and contribution graphs that flatline for months. This chapter turns your profile into an asset — a curated, professional presence that works for you while you sleep.
Start with the profile itself. Your username should be professional — ideally some form of your real name — because it appears on resumes and in search results. Add a profile README (a repository named exactly after your username): a short bio stating who you are, what you work on, your current focus, and links to your portfolio site, blog, and contact information. Include a concise list of your best projects with one-line descriptions and links. This profile README is your elevator pitch; keep it under a screen of scrolling. Pin your best repositories — GitHub lets you pin up to six — and choose them strategically: your three core projects from Chapters 3–5 should occupy three slots, with the remaining slots for your best supporting work (a strong Kaggle notebook, a useful open-source contribution, a well-written tutorial). Unpin everything else, especially forks and half-finished experiments.
Curate, do not accumulate. A profile with forty repositories, thirty-five of them tutorial copies, signals noise, not productivity. Archive or delete the tutorial repos — or at least make them private. What remains public should be work you are proud to discuss. For each public repository, ensure it has: a real README (Chapter 6), a clear description line, relevant topics/tags, a license, and a clean commit history. The commit history matters more than students realize: a repository with three commits ("final," "final2," "really final") suggests the work was dumped, not developed. You do not need to fake daily commits, but do commit incrementally as you work — it is good practice anyway, and the history becomes an honest record of your process.
The contribution graph: honesty over gaming. You have probably noticed the green contribution squares on profiles. Some students game them with meaningless commits. Do not. Reviewers can tell, and gaming signals the wrong values. Instead, let the graph reflect real work: your project commits, your blog repository updates, your open-source contributions. A modest but genuine graph beats a dense artificial one. What the graph should show is consistency — that you work regularly, not in panicked bursts. If you take a break for exams, that is fine; a gap with an explanation is human, while a suspicious wall of green is not.
Repository hygiene — the details reviewers notice. Use .gitignore properly so no data files, credentials, or virtual environments are committed. Never commit secrets — API keys, passwords, tokens. If you ever do accidentally, rotate the key immediately and learn the proper cleanup; a leaked key in history is a red flag to employers. Write meaningful commit messages: "Add cross-validation to price model; MAE improves 2.4M → 2.1M" tells a story, while "update" tells nothing. Use branches for experiments and pull requests even when working alone — it demonstrates professional workflow and makes your process visible. Add a license to every public repository (MIT is the common default for code; state data licenses separately). An unlicensed repository is legally ambiguous, and careful reviewers notice.
Make your work discoverable. GitHub is a search engine, and your repositories should be findable. Write description lines with the keywords people search for: "House price prediction in Karachi — gradient boosting model with deployed web app" beats "ml project." Add topic tags (machine-learning, data-visualization, nlp, and so on). Link related work: your blog post about the project should link to the repo, and the repo should link to the blog post. If your project produced a dataset or a small tool others could use, say so explicitly — reusable artifacts get starred, forked, and cited, and each of those is public evidence of impact.
The portfolio website: your front door. Beyond GitHub, build a simple personal website that presents your portfolio as a coherent whole — this is the polished front door, while GitHub is the workshop behind it. It does not need to be fancy: one page with your bio, your projects (each with a screenshot, a one-paragraph story, and links to the demo, repo, and blog post), your blog, and your contact information. A static site generated from markdown is fine; what matters is clarity and currency. Link it prominently from your GitHub profile, your resume, and your email signature. When someone Googles your name — and supervisors and recruiters will — this site should be what they find: professional, current, and impressive.
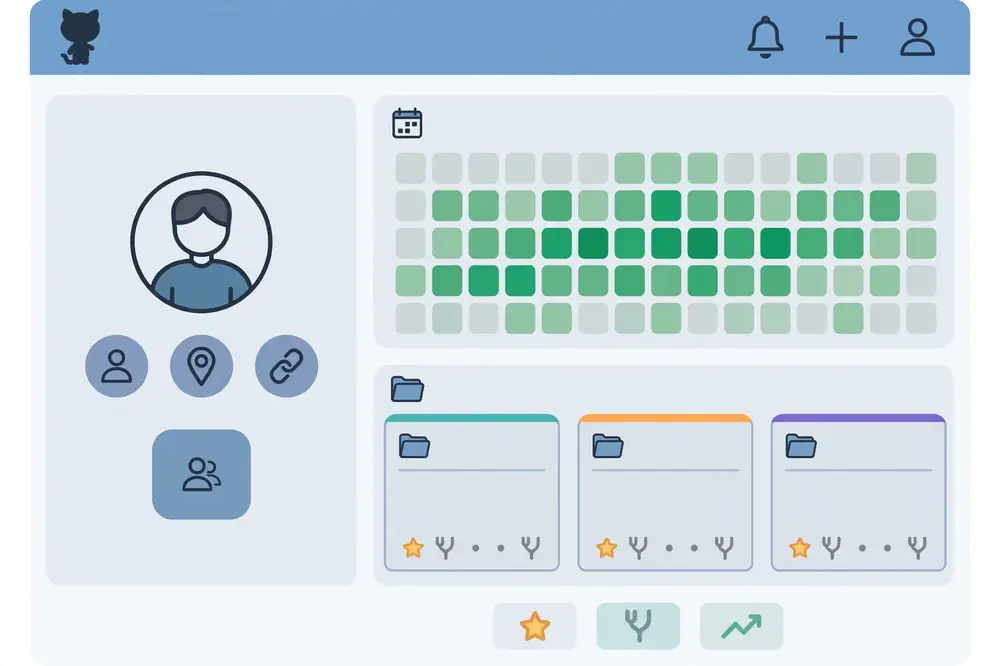
What to do this week. Profile transformation is a weekend project, not a semester project. Work through this checklist: (1) professionalize your username, bio, and profile README; (2) pin your six best repositories and unpin the rest; (3) archive or privatize tutorial clutter; (4) add READMEs, descriptions, topics, and licenses to everything public; (5) scan every public repo for committed secrets and clean up; (6) write meaningful descriptions with searchable keywords; (7) put up the one-page portfolio site and link it everywhere. Then maintain it: every time you finish a project, update the profile the same week. A profile that is current signals a professional who is active; a profile frozen two years ago signals someone who stopped.
When a reviewer opens one of your repositories, they scan it in a predictable order, and each element either builds or spends trust. The name should be descriptive and professional: karachi-house-price-predictor tells a story; ml-project-final-v2 tells none. The description line is a one-sentence pitch with keywords — write it as if for search, because it partly is. Topics/tags connect you to GitHub's discovery system; add all that honestly apply. The README (Chapter 6) does the heavy lifting. Below it, the reviewer glances at the file tree: clean, organized, with no clutter — committed datasets under control, no notebook-final-FINAL.ipynb duplicates. Then commit history: incremental, messaged, alive. Then, if interested, the code itself: readable, commented where non-obvious, with tests. A reviewer who finds all of this thinks, "this person works like a professional." None of it requires advanced skill — only care, applied consistently. That is the whole secret of repository hygiene: it is a checklist, not a talent.
A real working profile includes work in progress — and that is fine, if handled deliberately. Keep experiments on branches, not on main: experiment/xgboost-tuning is honest work-in-progress; a broken main branch is negligence. Use a clear naming convention and delete merged branches. For repos that are genuinely exploratory, say so in the README: "Exploratory work — code is messy, results are preliminary." Honesty defuses judgment. What you must avoid is the abandoned flagship: a repo presented as a portfolio piece whose main branch does not run. If a project is dormant, either archive it with a note or bring it current — the quarterly review in Chapter 12 is the mechanism. And remember: it is perfectly acceptable for most of your work to be private. Not everything needs an audience; curate what is public and let the private repos be your laboratory.
Your GitHub presence extends beyond repositories. Gists are excellent for sharing small, useful snippets — a tricky data-cleaning function, a plotting helper — and they are discoverable and forkable, acting as micro-portfolio pieces. Thoughtful issue reports on projects you use (clear reproduction steps, environment details, expected vs. actual behavior) demonstrate debugging skill and are publicly visible contributions even before you submit code. Discussions where you answer others' questions build reputation. Even your commit messages across contributions tell a story of how you think. None of this requires permission or invitation — it is all available to you today, and collectively it paints a picture of an engaged, competent practitioner. When a reviewer digs deeper than your pinned repos, this is the texture they find — make it good.
GitHub renders a special repository — one named exactly after your username — as your profile's front page. This is prime real estate; use it deliberately. Structure it in four short blocks. Who you are: one or two lines — your status, your focus, your location if you wish. "MS student in AI at [university], building applied ML systems; interested in NLP and public-sector data." What you are working on now: two or three bullets with links — your current flagship project, your latest blog post, your active competition. This block is the one you update most often, and its freshness signals that you are active. Selected work: your three to five best pieces with one-line outcome statements and links — the same curation as your pins, in words. Find me: portfolio site, blog, email, and professional social profiles. Keep the whole thing scannable in under a minute — no walls of text, no skill-bar graphics, no auto-generated stats widgets that add noise. A crisp, current profile README tells a reviewer in thirty seconds that this is a serious, organized person. Write it once, update it monthly. One more detail worth adding: a short "currently learning" line. It humanizes the profile and signals growth — "Currently learning: evaluation methods for LLM systems" tells a reviewer you are actively stretching, which is exactly what employers and supervisors want to see in a junior candidate. Keep it honest and current; rotate it as your focus shifts.
Students often obsess over stars and followers as measures of worth. Keep them in perspective. Stars correlate with usefulness and discoverability, not necessarily quality — a handy snippet repo can out-star a superb research project. A handful of stars on a genuinely useful tool is a real achievement; zero stars on an excellent portfolio project is completely normal and says nothing about its quality, because portfolio projects are read by reviewers, not browsed by the crowd. What actually matters for your goals: can a reviewer find your work, understand it in five minutes, and verify your claims? Optimize for that, not for vanity metrics. That said, if one of your projects does attract users — issues filed, PRs opened, stars accumulating — nurture it: respond to issues, keep it working, and feature it prominently. Maintaining a project that strangers use is one of the strongest experiences you can put on a resume, because it proves you can support real users, not just write code.
For your research: Your GitHub profile is increasingly part of academic evaluation. Admissions committees and supervisors do check applicants' online presence, and a profile showing reproducible research code — with READMEs, pinned dependencies, and honest experiment logs — is a quiet but powerful supporting document for any application. When you publish a paper, link the code repository from the paper and the paper from the repository; this two-way linking is becoming standard practice in reputable venues, and it makes your work citable and reusable — which is how research impact compounds.
Key takeaways: - Your profile is a self-updating resume: professional username, profile README, and six strategic pins. - Curate ruthlessly: archive tutorial clutter; every public repo should be work you can defend in conversation. - Commit incrementally with meaningful messages; the history is an honest record of your process. - Never commit secrets; use .gitignore, branches, and licenses as a matter of routine. - Make repos discoverable: keyword-rich descriptions, topic tags, and two-way links with your blog. - Build a simple one-page portfolio website as your front door; link it from your profile, resume, and email. - Profile cleanup is a weekend project; maintenance is a same-week habit after each finished project.
You have built projects, documented them, and curated your profile. Now comes the activity that multiplies the value of everything else: writing about your work in public. Blogging — technical writing published where anyone can read it — is the highest-leverage habit in this book. It deepens your understanding, demonstrates your communication skills, builds your reputation, and creates discoverable evidence of your thinking. Many students resist it ("who would read what I write?"), but the primary reader is your future self and your future reviewer — and both are guaranteed readers.
Why writing works: the generation effect. Cognitive science has long established that explaining something in your own words produces deeper understanding than passively reviewing it — the effort of generating an explanation forces you to organize knowledge, find gaps, and resolve them. Every blog post you write about a project is therefore also a study session: you will discover, while writing, the parts of your project you do not fully understand, and fixing those gaps makes you genuinely more competent. This is why the best way to learn something is often described as teaching it. A blog is teaching at scale, and the student who benefits most is you.
What to write about. You do not need original research to blog; you need honest explanation. The richest source is your own portfolio projects: write a post for each one, telling the story the README summarizes — the problem, the interesting obstacle, what you tried, what worked, what you learned. Beyond projects, excellent topics include: something you struggled to understand and finally grasped (your confusion is shared by thousands of readers); a comparison of two approaches you tried; a failure analysis — what went wrong and why (these posts are rare, valuable, and memorable); a clear explanation of a concept from your coursework or research; and notes on papers you read, summarizing the contribution in your own words. That last category doubles as literature-review practice for your thesis.
How to write a good technical post. Structure beats brilliance. Open with the problem or question in plain language — hook the reader before introducing any technique. Then walk through your thinking step by step, showing code and output where they help, but narrating why at each step, not just what. Readers can find code anywhere; they come to your post for judgment and explanation. Use small, complete, runnable examples rather than fragments. Include at least one figure where a visual would help — a chart you already made for the project. Close with what you learned and open questions. Keep posts focused: one idea per post, 800–1,500 words. A short post that fully explains one thing beats a long post that half-explains five.
Write in plain language, always. The curse of technical writing is jargon that obscures instead of clarifies — and students often imitate the densest academic prose they have read, mistaking obscurity for sophistication. Do the opposite: if you can explain gradient boosting so that a smart undergraduate in another field follows it, you understand it; if you cannot, the post will reveal that, and fixing it is the learning. Read each post aloud before publishing; awkward sentences reveal themselves to the ear. And be honest about uncertainty: "I am not sure why this happens; my best guess is…" is a sentence that builds trust and often draws helpful comments from experts.
Where to publish and how often. Publish on a platform where your work is discoverable and portable: your own site (best for ownership), or a technical publishing platform with a built-in audience. Cross-post thoughtfully rather than duplicating everywhere. Aim for one post per month — a sustainable pace that yields twelve posts a year, a substantial body of writing. Each post should link to the relevant project repository, and each repository should link back to its post. This cross-linking turns your blog and GitHub into a single navigable body of work: a reviewer who finds either one discovers the other.
Handling the fear of being wrong in public. This is the real barrier, so let us address it directly. Yes, you might publish something with an error, and someone might correct you. That is not a disaster; it is the mechanism working. Public correction is free expert review, and handling it gracefully — thanking the commenter, fixing the post, noting the correction — demonstrates exactly the intellectual honesty that reviewers and supervisors value. Far worse is never publishing, which guarantees zero feedback and zero visibility. Start with posts about things you are confident in, keep claims modest and sourced, and remember: a student blog is judged by clarity and honesty, not by infallibility. Every expert you admire has published corrections; it is part of the craft.
Blogging as research training. For researcher students, blogging is a low-stakes rehearsal for high-stakes writing. A blog post explaining your thesis method is a draft of your methods section. A post summarizing three related papers is a draft of your related-work section. A post analyzing your experiment results is a draft of your results discussion. Write these as blog posts first — informal, exploratory, public — and you will find the formal versions dramatically easier to write. Some researchers even find that blog posts attract collaborators: a clear explanation of a niche problem is a beacon to the handful of people worldwide who care about it. Your future co-authors may find you through your writing before they find you through your papers.
You do not need to invent a style from nothing — pick the archetype that fits you and grow from there. The explainer takes confusing topics and makes them clear: "I finally understand cross-validation — here is the explanation I wish I had." Explainers serve the largest audience and build the broadest reputation. The builder writes project stories: what they built, the obstacle, the fix, the lesson. Builders convert directly into portfolio strength, because every post is evidence of shipped work. The researcher writes reading notes and experiment analyses: paper summaries, replication attempts, honest negative results. Researchers build the deepest credibility with academic audiences. Most successful technical bloggers blend all three over time, but starting with one gives you a template for your first half-dozen posts. Whichever you choose, the non-negotiables are the same: plain language, runnable examples, honest uncertainty, and one idea per post.
Treat each post with a lightweight editorial process — not bureaucracy, but quality control. Draft: write fast, focusing on structure and explanation; do not edit while drafting. Rest: leave it for at least a day; fresh eyes catch unclear passages your tired brain skipped. Self-review: read aloud, check every code snippet by running it, verify every factual claim, and cut anything that does not serve the one idea. Peer review: ask one person — a classmate, a friend, a community member — to read it and mark every confusing sentence. This single step improves posts more than any other, because you cannot see your own blind spots. Publish and distribute: post it, share it once in the relevant community (your university group, a forum, a social channel), and link it from the project repo. Engage: respond to every comment thoughtfully, especially corrections — each is a gift of free review. Maintain: if a post becomes outdated (APIs change, better methods emerge), add an update note at the top rather than silently editing history. This workflow takes a post from "notes I wrote" to "article worth reading," and the habit compounds: your tenth post will take half the time of your first and read twice as well.
Every blogger starts with an audience of zero, and the early months can feel like shouting into a void. Two things are true at once: the void is normal, and the work is still worth doing. The primary value — deeper understanding, writing skill, portfolio evidence — accrues regardless of readership. But readership does grow if you help it: write posts that answer questions people actually search for (the question you Googled last week is being Googled by hundreds of others), use clear descriptive titles, share in communities where the topic is relevant (not spammed everywhere), and engage genuinely with others' work — comment thoughtfully on posts you admire, and their readers discover you. Consistency matters more than virality: twelve solid posts over a year build a library that search engines and reviewers find; one viral post builds a spike that fades. Play the long game. And remember the guaranteed readers from this chapter's opening: your future self, preparing for an interview, will be grateful for every post; your future reviewer, deciding between candidates, may be the one reader who matters most.
Once you have a few standalone posts, consider writing in series — three to five posts exploring one topic in depth. A series like "Understanding evaluation metrics, parts 1–4" or "Building my first deployed model, a five-part diary" does something a single post cannot: it demonstrates sustained thinking and keeps readers returning. Series are also easier to write than they look, because each installment is still just one focused idea — the series structure simply connects them. They compound in value: a complete series becomes a mini-course, something you can link as a whole ("my series on model evaluation"), and reviewers encountering it see depth, not just breadth. Plan the series outline before writing part one — the topics, the order, the arc — but allow it to evolve as you learn. And when the series is done, write a roundup post linking all parts with a paragraph on what the series taught you overall. That roundup often becomes the most-shared piece, because it packages the whole journey for busy readers.
The posts students are most afraid to write — "here is what went wrong" — are the ones most worth writing. A failure analysis post ("How data leakage gave me 99% accuracy and taught me to distrust it") does three things no success story can. First, it teaches a lesson readers genuinely need, because everyone makes these mistakes and few admit them. Second, it demonstrates intellectual honesty, the trait reviewers and supervisors value most. Third, it is memorable — people remember the author who explained the trap far longer than the author who posted another accuracy number. The structure is simple: what you attempted, what went wrong, how you discovered it, what the correct approach was, and the general lesson. Be specific about the mistake — vague confessions teach nothing — and be generous with the lesson, because the reader's next project is where it pays off. Write one failure post per project if you can; the set becomes a candid education in real-world machine learning that no textbook provides.
For your research: Start a "research notes" blogging habit alongside your thesis: one post per month explaining something from your research — a method you implemented, a paper that influenced you, an experiment that surprised you. These posts become a public lab notebook that demonstrates your thinking process to supervisors and admissions committees. When you later write your thesis, you will mine these posts for structure and phrasing. And when you apply for positions, a year of thoughtful research blogging is distinctive evidence of a genuine researcher — it shows you think in public, which is what academia ultimately rewards.
Key takeaways: - Explaining your work in writing deepens your own understanding — the blog's first beneficiary is you. - Write about your projects, your struggles, your failures, and papers you read; honesty and clarity beat novelty. - Structure every post: plain-language problem, step-by-step thinking with runnable examples, learnings and open questions. - One focused idea per post, 800–1,500 words; read aloud before publishing; prefer plain language over jargon. - Publish monthly on a discoverable platform; cross-link every post with its project repository. - Being corrected in public is free expert review — handle it gracefully and keep publishing. - Blogging is low-stakes rehearsal for papers and theses: methods, related work, and results all start as posts.
Competitions — Kaggle being the best-known platform — are where your portfolio meets reality. In your own projects, you choose the question, the data, and the deadline. In a competition, someone else sets all three, the data is messier than you expect, the leaderboard tells you exactly where you stand, and the clock is ticking. This pressure is uncomfortable and enormously educational. A competition compresses months of casual learning into weeks of focused work, and a respectable leaderboard finish is public, verifiable proof of your modeling skill that any reviewer can check in seconds.
Why competitions teach so fast. Four mechanisms are at work. First, real data: competition datasets are collected for a real purpose and contain the missing values, noise, and quirks of the real world — far better training than clean textbook datasets. Second, a real objective: the evaluation metric is fixed and public, so you learn to optimize what actually matters rather than what is convenient. Third, immediate feedback: every submission gets a score, so you learn the relationship between your ideas and their outcomes within hours, not months. Fourth, the community: public notebooks and discussion forums expose you to approaches you would never invent alone — feature engineering tricks, validation strategies, ensemble methods — taught by practitioners solving the same problem. Reading the top solutions after a competition ends is one of the densest learning experiences available in machine learning.
How to start without drowning. Kaggle can be overwhelming: thousands of competitions, complex leaderboards, experts with years of experience. The strategy for beginners is deliberate. Start with a "playground" or beginner-friendly competition — these are designed for learning, with simpler data and generous timelines. Your goal for the first competition is not to win; it is to complete the full loop: understand the problem, explore the data, build a baseline, iterate, validate properly, and submit. A finished submission at any rank beats an abandoned ambitious attempt. For your second competition, add one new skill: proper cross-validation, or a new model family, or careful feature engineering. Each competition should stretch exactly one new capability — that is how you convert pressure into growth without burning out.
Validation discipline — the core competitive skill. The single most important lesson competitions teach is validation: building an evaluation setup on your training data that reliably predicts your leaderboard score. Competitors who validate well can test dozens of ideas quickly and trust the results; those who validate poorly chase leaderboard noise and overfit to the public split. The mechanics matter: use cross-validation with the right splitting strategy for the problem (time-based splits for time-series data, grouped splits when rows are not independent), keep a holdout set you rarely touch, and track every experiment — its configuration, its validation score, and its public score — in a log. When your validation scores and leaderboard scores move together, you have built something precious: a trustworthy offline laboratory. This discipline transfers directly to research, where there is no leaderboard and your validation setup is the only thing standing between you and self-deception.
Learning from the community — honestly. Kaggle's public notebooks and forums are a goldmine, but use them with integrity and intelligence. Reading others' approaches to learn techniques is excellent; copying a top solution line-by-line and submitting it as your own teaches nothing and, in some competitions, violates the rules. The productive pattern is: attempt the problem yourself first, get a baseline on the board, then study the public notebooks to understand what you missed, and finally implement your own improved version incorporating what you learned. Write up what you learned afterward — a blog post or a competition retrospective in your portfolio. "I placed in the top 30% of 2,000 teams; here is what the top solutions taught me about target encoding" is a portfolio entry that shows humility, learning, and technical depth all at once.
Beyond Kaggle. Kaggle is the largest platform, but not the only one. Domain-specific competitions — in areas like medical imaging, natural language processing, or your own research field — may be more relevant to your goals and less crowded. University and industry hackathons offer similar pressure with the added benefit of in-person collaboration and networking. And some of the best "competitions" are informal: reproducing a published paper's results on a public benchmark, or beating a known baseline on a standard dataset, documented in your portfolio. What matters is not the platform but the structure: a fixed task, a fixed metric, a deadline, and public results.
What competitions give your portfolio. Each serious competition entry becomes a portfolio piece with unique properties: it is timestamped, ranked, and publicly verifiable. Link your best competition profiles and notebooks from your portfolio site and GitHub. But be selective — feature the competitions where you learned something worth describing, not every quick submission. And always write the retrospective: what the problem was, your approach, your validation strategy, your final rank, and what you would do differently. The retrospective is what converts a leaderboard number into a story a reviewer can appreciate. A top-10% finish with no explanation is a brag; the same finish with a thoughtful write-up is evidence of a maturing practitioner.
A final caution: competitions can become addictive, and leaderboard-chasing can crowd out deeper work. Set boundaries: one competition at a time, a fixed weekly time budget, and a clear stopping rule (when the deadline hits, or when your validation stops improving). Remember that competitions teach modeling and validation brilliantly but teach little about problem framing, deployment, or communication — which is exactly why this book pairs them with your own projects, your READMEs, and your blog. The portfolio needs all of it.
Here is a realistic four-week plan for your first competition — concrete enough to follow. Week 1 — understand and explore: read the problem statement and evaluation metric until you can explain both in your own words; explore the data thoroughly (distributions, missingness, relationships); write an exploration notebook; build the simplest baseline and submit it — getting on the board early removes the psychological barrier. Week 2 — validate: build your cross-validation setup, choosing the split strategy that matches the problem (time-based for temporal data, grouped when rows share entities); verify that your validation scores roughly track the public leaderboard; start a written experiment log. Week 3 — iterate: try feature engineering ideas one at a time, then model variations; study two or three public notebooks after your baseline is solid and implement what you learn in your own code; watch for the gap between validation and leaderboard — if it widens, your validation is lying to you. Week 4 — refine and document: ensemble your best diverse models if it helps validation; do a final honest check for leakage; write the retrospective post; make your final submissions with a calm, pre-decided strategy rather than last-minute flailing. This plan is deliberately unglamorous — exploration, validation, iteration, documentation — because competitions are won by discipline, not by genius ideas in the final hours.
The educational gold of competitions is in the post-competition write-ups, but only if you read them actively. Here is the method: for each top solution, reconstruct why it worked, not just what it did. What did the winners understand about the data that you missed? (Often it is a subtle leakage pattern or a domain insight.) What validation strategy let them iterate confidently? Which of their ideas would transfer to other problems, and which were specific to this dataset? Write these as notes in your retrospective — three transferable lessons per competition is an excellent yield. Then, crucially, reimplement one idea yourself on a small scale, even after the competition ends. Reading about target encoding is passive; implementing it on your own project makes it yours. Over several competitions, this practice builds a personal toolkit of techniques you genuinely understand — and that toolkit is what interviewers probe when they ask about your competition experience.
Many competitions allow teams, and joining one is worth doing at least once — it teaches a different skill set from solo competing. Teams force you to divide work (who explores, who engineers features, who validates), communicate findings clearly (your teammate cannot read your mind or your messy notebook), merge different approaches (ensembling teammates' models), and resolve disagreements about strategy under deadline pressure. These are exactly the collaboration skills employers test for and open-source work develops more slowly. Choose teammates with complementary strengths and similar commitment levels — mismatched effort is the main cause of team friction. Document the collaboration itself in your retrospective: what the division of labor was, what worked, what you would change. A portfolio entry that describes successful teamwork under pressure is distinctive, because most student portfolios show only solo work.
In the last stretch of a competition, most competitors turn to ensembling — combining multiple models' predictions — because it reliably squeezes out final gains. Understand why it works, not just how: ensembles help when the component models make different errors, so diversity matters more than individual strength. A blend of a gradient boosting model, a neural network, and a well-engineered linear model often beats three similar boosting models. In practice: train diverse models with solid validation, combine them with simple averaging or weighted blending tuned on validation (not on the leaderboard), and resist the urge to stack ten models when three diverse ones capture most of the gain. Document what you ensembled and why in your retrospective — "blending added 0.003 to validation, consistent with public score" is an honest, professional note. And know when to stop: if your validation says the ensemble is not helping, trust it. The discipline to not submit a worse ensemble is the same discipline that makes your validation trustworthy.
When the competition ends, the real portfolio work begins. Write the retrospective within a week, while the details are fresh, following this structure: the problem in two sentences; your approach — the pipeline, the key ideas, what worked and what did not; your validation strategy and how well it predicted the leaderboard; your final rank stated plainly with the field size for context; three lessons — techniques you will reuse, mistakes you will not repeat; and links to your code and profile. Publish it as a blog post and link it from your portfolio site. This document is what converts a number on a leaderboard into a story of growth — and it is the part interviewers actually ask about. "Tell me about a competition you entered" is an invitation to tell this story; the retrospective is your rehearsal. Over several competitions, these retrospectives form a public journal of your development as a modeler — arguably more valuable than the ranks themselves.
For your research: Competition discipline maps directly onto rigorous experimental research. The habits — fixed evaluation metrics, proper validation splits, experiment logs, ablation studies (testing what happens when you remove each component), and honest reporting of negative results — are precisely what separate publishable research from irreproducible tinkering. If your thesis involves empirical comparison of methods, run it like a competition against yourself: define the metric, build the validation harness, log every experiment, and report everything. Reviewers of your papers will be, in effect, checking your leaderboard — make sure your numbers are honest.
Key takeaways: - Competitions compress learning through real data, fixed objectives, immediate feedback, and community knowledge. - Start with beginner-friendly competitions; the first goal is completing the full loop, not winning. - Validation discipline is the core skill: build an offline evaluation that reliably predicts real performance. - Study public solutions only after establishing your own baseline; implement learned ideas yourself. - Write a retrospective for each serious entry: approach, validation, rank, and lessons — the story matters more than the number. - Feature select competitions in your portfolio; link verifiable profiles and notebooks. - Set boundaries: competitions teach modeling, not framing or deployment — keep them in balance with your projects.
There is one question your personal projects cannot fully answer: can you work on someone else's code? Every employer and every research lab needs people who can read unfamiliar codebases, follow existing conventions, accept feedback in code review, and collaborate with strangers. Open-source contributions are the public proof that you can. A merged pull request in a real project — even a small one — tells a reviewer that you navigated a real codebase, communicated with maintainers, and met someone else's quality bar. It is one of the strongest single signals a junior portfolio can contain.
Why maintainers value small contributions. Students imagine that meaningful contribution requires implementing a major feature. In reality, maintainers treasure small, careful work: fixing a bug, improving documentation, adding a test, correcting a tutorial. These contributions are valuable because they are numerous and often neglected — and they are the perfect entry point because they are scoped, reviewable, and low-risk. A documentation fix that clarifies a confusing installation step may help thousands of users. Do not underestimate the portfolio value either: a reviewer who sees three merged pull requests — a bug fix, a documentation improvement, and a test — sees someone who contributes usefully and collaborates well. That is exactly the profile teams want to hire.
Finding the right project. Choose projects you actually use or care about: a data science library, a visualization tool, a framework from your coursework. You will contribute better to code you understand as a user. Look for projects with signs of a healthy community: a contributing guide, labeled "good first issue" tickets, responsive maintainers, and recent activity. Avoid projects that are abandoned or hostile — your time is better spent where contributions are welcomed. Start by using the project, reading its documentation, and lurking in its issue tracker to understand what needs doing. The best first contributions often come from your own experience: the confusing error message you hit, the missing example you wished existed, the edge case that broke your code.
The contribution workflow, step by step. (1) Read the contributing guide fully — it tells you the project's conventions for code style, testing, and commit messages. (2) Find or confirm an issue: pick a labeled beginner issue, or open one describing a problem you found, and comment that you would like to work on it so nobody duplicates effort. (3) Fork the repository and create a focused branch for your change — one branch, one issue, one clear purpose. (4) Make the change following the project's style, and add or update tests if the project has them. (5) Run the project's test suite locally and make sure everything passes. (6) Open a pull request with a clear title and description: what the problem was, what you changed, how you tested it, and any remaining questions. (7) Respond to review feedback promptly and graciously — this is the collaboration the reviewer of your portfolio is watching for. (8) Once merged, celebrate briefly, then document the contribution in your portfolio.
Code review: the real education. The review process is where the deepest learning happens. A maintainer might ask you to restructure your fix, handle an edge case you missed, or follow a convention you did not know existed. This feedback — specific, expert, on your actual code — is worth more than a semester of lectures. Receive it with gratitude and curiosity, not defensiveness. Ask questions when you do not understand a request. Make the requested changes carefully. Every round of review makes you a better engineer, and the public record of you handling feedback well is itself portfolio gold: it shows future employers exactly how you collaborate.
Documenting contributions in your portfolio. Open-source work deserves a place in your portfolio alongside your own projects. On your portfolio site, add a section listing your contributions: the project, the change, a link to the merged pull request, and one line on what you learned. In interviews, these contributions give you stories about real collaboration — navigating a large codebase, debating a design decision with a maintainer, fixing a subtle bug. Keep a personal log of contributions as you go: date, project, issue, pull request link, and status. Over a year or two, this log becomes an impressive record of sustained community participation.
Giving back beyond code. As you grow, expand how you contribute: answer questions in issue trackers and forums, improve tutorials, mentor newer contributors, and eventually help review others' pull requests. These activities build reputation and relationships in the community — and relationships are how opportunities arrive. The maintainer who merged your pull request may one day recommend you for a role. The contributor you helped may become a collaborator. Open source is a professional network built through useful work, and for a researcher, it overlaps naturally with the academic community: many research tools are open source, and contributing to them is a form of service to your field.
Here is a realistic first month that takes you from zero to first merged contribution. Week 1 — observe: pick one project you use regularly; read its contributing guide end to end; browse the issue tracker, noting which issues are labeled for beginners; read three recently merged pull requests to absorb the project's conventions — how PRs are titled, how changes are described, what review looks like. Week 2 — engage small: comment helpfully on one issue (confirming a bug with reproduction steps counts), or fix a typo in the documentation — the smallest possible merged change, just to learn the mechanical workflow of fork, branch, PR. Week 3 — a real issue: claim a beginner-friendly issue; reproduce the problem locally; implement the fix with tests; open the pull request with a clear description. Week 4 — review and reflect: respond to maintainer feedback, iterate until merge, then write up the experience — what the codebase taught you, how the review improved your change. One merged PR in a month is a genuine achievement, and the write-up becomes a portfolio entry. Repeat monthly, gradually taking on larger issues, and within a year you will have a contribution record that most junior applicants cannot match.
A short list, gathered from the collective wisdom of open-source maintainers, that will make your contributions welcome everywhere. Read before asking: the contributing guide, the existing issues, and the docs answer most questions — asking something clearly documented signals you did not do the homework. Small PRs get merged: a focused 50-line change is reviewed in days; a sprawling 2,000-line rewrite languishes for months. Split large work into reviewable pieces. Tests are the price of admission: a bug fix without a regression test will often be sent back — the test proves the fix and prevents recurrence. Describe, do not just diff: the PR description should explain the problem, the approach, and the testing — maintainers review dozens of PRs and reward the ones that respect their time. Be patient and gracious: maintainers are volunteers with day jobs; a polite follow-up after two weeks is fine, entitlement is not. Accept "no": sometimes your approach does not fit the project's direction, and the PR is declined — thank the reviewer, learn from the reasoning, and move on. Contributors who internalize these norms get their work merged faster and build lasting relationships with maintainers.
The deepest value of open source unfolds over time, as you grow from occasional contributor to community member. After several merged PRs, you will understand a codebase well enough to help newcomers — answering their questions, reviewing their first PRs, improving onboarding docs. This mentorship is visible, valued, and excellent portfolio material: "helped onboard new contributors to Project X" signals leadership potential. Some contributors eventually become maintainers themselves, with merge rights and responsibility for a component — a credential that speaks loudly on any resume or academic application. You do not need to plan this trajectory now; just know it exists, and that every journey starts with the small, careful first PR from this chapter. The community you build around shared work often becomes your professional network for years — choose your projects as you would choose colleagues, because that is what they become. Start this month, stay consistent, and let the record of your contributions speak for your reliability long before any interview begins.
If code contributions feel intimidating, start where the barrier is lowest and the value is highest: documentation. Every popular project has docs that are incomplete, outdated, or confusing — and maintainers know it, which is why doc PRs are welcomed warmly. The work is real: clarifying an installation step that confused you, adding an example you wished existed, fixing a tutorial that broke with the latest release, translating a page. To do it well, you must understand the feature you are documenting, which means reading the code — so doc contributions secretly teach you the codebase. They also teach you the project's review process with low stakes. Many long-term maintainers started with a docs fix; it is the traditional on-ramp, not a consolation prize. And on your portfolio, "improved documentation for [project], merged" sits perfectly alongside code contributions — it shows you care about users, not just code. A practical tip for finding these opportunities: search the issue tracker for labels like "documentation," "good first issue," or "help wanted," and skim recent releases for features whose docs lag behind the code. The gap between a new feature and its documentation is where some of the most welcome contributions live, and filling it teaches you the feature deeply while earning the maintainer's gratitude.
The most intimidating moment in open source is opening a repository with a hundred thousand lines of someone else's code. Here is how experienced contributors orient themselves. Start from the user's perspective: run the project, trigger the behavior related to your issue, and observe. Trace inward: from the entry point (the CLI command, the API call), follow the code path to the relevant module — debuggers and print statements are legitimate tools here. Read the tests first: test files are often the clearest documentation of intended behavior, showing what functions do with concrete examples. Map the architecture: sketch the main modules and their relationships on paper; ten minutes of sketching saves hours of confusion. Ask oriented questions: when stuck, ask the community specific questions ("I traced the bug to module X, function Y — is Z the right place to fix it?") rather than "how does this work?" — oriented questions get fast, helpful answers and show you have done the work. Each codebase you navigate makes the next one easier; after three or four, "large unfamiliar codebase" stops being frightening and becomes a familiar puzzle.
For your research: Contributing to the open-source tools your field uses — a statistics library, a visualization package, a domain-specific toolkit — is scholarly service with portfolio benefits. It deepens your understanding of the tools your research depends on, connects you with their developers (who are often researchers themselves), and produces a public record of expertise. If your thesis produces a reusable tool or dataset, consider releasing it open source with documentation: citable, reusable research artifacts are increasingly valued in academic evaluation, and they extend your work's impact far beyond the thesis.
Key takeaways: - Merged pull requests prove you can work on others' code — a signal personal projects cannot provide. - Small contributions (bug fixes, docs, tests) are genuinely valuable and the ideal entry point. - Choose projects you use, with healthy communities and beginner-friendly issues. - Follow the full workflow: read the guide, claim an issue, branch, test, clear PR description, gracious review response. - Code review feedback is elite, personalized education — receive it with curiosity. - Document contributions in your portfolio with links to merged PRs and lessons learned. - Expand over time into answering questions, mentoring, and reviewing — reputation compounds through useful work.
Everything you have built — the projects, the READMEs, the profile, the blog, the competitions, the open-source work — converges in one high-stakes moment: the interview, or the supervision meeting, where a human asks you to explain what you did and why. Many technically strong students underperform here, not from lack of skill but from lack of preparation. They ramble, they undersell, they cannot explain their own decisions. This chapter gives you a structure for presenting your work under scrutiny — whether the audience is a hiring panel, a prospective PhD supervisor, or a thesis committee.
The project story framework. For each portfolio project, prepare a five-minute story with four beats: Problem — what question or need motivated this, and why it mattered. Approach — what you did, focusing on decisions and trade-offs rather than a exhaustive list of steps. Result — what you achieved, with the key numbers. Reflection — what you learned, what the limitations were, and what you would do next. Practice this story aloud until it flows naturally — not memorized word-for-word, but structured so you never ramble. The framework works because it mirrors how experts evaluate work: they care about your judgment (why this approach?), your honesty (what are the limits?), and your growth (what did you learn?), far more than about the specific tools you used.
The live walkthrough. Interviewers will often ask you to walk through a project on screen — your repository, your demo, your notebook. Prepare for this explicitly. Know exactly which files to open and in what order: README first (the story), then the key code or notebook cells, then the demo. Clean up anything you would not want examined — dead code, embarrassing comments, broken links — because the reviewer will click around. Have the demo running and tested before the call; nothing kills momentum like a live app crashing. And narrate as you go: explain what the viewer is seeing and why it matters, rather than silently scrolling. You are the tour guide of your own work — act like one.
Handling hard questions. The questions that frighten students are actually opportunities, if you handle them well. "Why did you choose this model over that one?" — walk through your comparison honestly, including what you tried that did not work. "What are the limitations?" — state them plainly; you already wrote them in your README, so this is rehearsed ground. "What would you do with more time?" — show ambition grounded in understanding: name the specific next experiment, not a vague "make it better." "I see your accuracy is X — is that good?" — contextualize with the baseline, exactly as Chapter 4 taught. And the dreaded "I don't know": say it cheerfully and follow with how you would find out. Interviewers ask hard questions to test honesty and thinking, not to hear perfection. A candidate who says "I don't know, but here's how I'd investigate" outscores one who bluffs — every time.
Questions for academic settings. Supervision meetings and PhD interviews have their own flavor. The supervisor is asking: can this person do independent research? Your portfolio answers through specific evidence: the experiment log shows you can run disciplined experiments; the limitations sections show intellectual honesty; the blog posts show you can explain ideas; the open-source contributions show you can collaborate. Prepare to connect each project to research skills explicitly: "In this project I learned to design validation experiments, which is directly relevant to evaluating models in your lab's work on…" Do your homework on the supervisor's research and prepare one genuine question about it — curiosity about their work signals that you think like a researcher, not just a job applicant.
The portfolio leave-behind. After the interview, your portfolio keeps working. Send a brief thank-you note with a link to your portfolio site — not to everything, but to the one or two projects most relevant to the role or lab. This focused follow-up shows professionalism and makes it easy for the interviewer to revisit your best work when making decisions. Keep your portfolio site's "featured projects" section aligned with the roles you are targeting: if you are applying to data science roles, lead with the analysis and deployed model; for research positions, lead with the most methodologically rigorous work. One portfolio, many spotlights — curate the emphasis per audience.
Practice deliberately. Presentation is a skill, and skills improve with practice. Rehearse your project stories with a friend, a study group, or recorded on your phone — watching yourself reveals rambling, filler words, and unclear explanations. Do mock interviews if your university offers them. Prepare answers for the ten most common questions about each project. And after every real interview, write down what you were asked and how you answered; this debrief becomes a study guide for the next one. Students who treat interviewing as a practicable skill improve fast; those who treat it as innate talent stay nervous forever.
Before any project story, you need a thirty-second self-introduction that frames everything that follows. The formula: who you are, what you work on, and the one proof point that makes you memorable. "I'm a final-year CS student focused on applied machine learning. Recently I built a deployed house-price predictor for Karachi — 12,000 listings, 2.1M PKR mean error — and I write about what I learn building these systems on my blog." In three sentences, the interviewer knows your identity, your evidence, and that you communicate. Contrast with the common alternative — "I'm a hardworking student passionate about AI" — which says nothing verifiable. Prepare two or three variants tailored to different audiences (industry role vs. research lab), and rehearse until they sound conversational rather than recited. This pitch is also your answer to "tell me about yourself" — the question that opens nearly every interview — and getting it right sets the tone for everything after.
Not every evaluation happens in a live conversation. Often your portfolio must speak through a cold email to a professor, a scholarship application, or an online form with a link field and no explanation. For these, prepare a portfolio cover note: three to four sentences linking your two most relevant pieces to the opportunity, with direct links. Example: "I'm applying for the research assistant position in your lab. My recent work includes an end-to-end analysis of urban air-quality data [link] with a reproducible cleaning pipeline, and a deployed Q&A assistant over department documents [link] with a documented evaluation harness — both directly relevant to the data work described in your posting." This is not a generic cover letter; it is a targeted evidence brief. Professors receive many vague emails expressing interest; very few include specific, relevant, verifiable work. Be the applicant who does.
Even with preparation, interviews go sideways: a demo crashes, a question stumps you, you ramble through an answer and see the interviewer's attention drift. What matters is recovery, not perfection. If the demo crashes: stay calm, narrate what is happening ("the model service seems to have timed out — let me show you the recorded walkthrough while it restarts"), and move on without apologizing excessively. If you are stumped: say so honestly, think aloud about how you would approach it, and offer to follow up — then actually follow up with the answer in your thank-you note, which turns a weak moment into evidence of diligence. If you rambled: pause, smile, and summarize ("the short version is…") — interviewers forgive a ramble that ends in clarity. And after a genuinely bad interview, debrief in writing within the hour: what went wrong, what you will change, and one thing that went well. Every interview, good or bad, is training data for the next one — but only if you log it.
An interview is a two-way evaluation, and the questions you ask reveal as much as your answers. Prepare five or six genuine questions, and choose two or three based on how the conversation goes. For employers, ask about the work itself: "What does the first project for someone in this role typically look like?" reveals what you would actually do; "How does the team evaluate model quality before deployment?" reveals their engineering maturity (and lets you connect your validation discipline); "What is something the team is struggling with right now?" shows you think like a colleague, not an applicant. For academic supervisors, ask about the research: "What is the most exciting open question in the lab right now?" shows genuine curiosity; "How do students in the lab typically go from coursework to independent research?" shows you are thinking about the path; "What does a successful first year look like for your students?" shows you take the commitment seriously. Avoid questions answered on the website, questions about salary in a first academic meeting, and flattery disguised as questions. Good questions do double duty: they give you real information for your decision, and they show the interviewer the quality of your thinking.
In video interviews — the default for remote roles and many academic meetings — logistics are part of the message. Test everything the day before: camera, microphone, screen sharing, and the demo you plan to show. Frame yourself well: face a light source, keep the background neutral and uncluttered, and look at the camera when making key points. Have materials ready: the portfolio site open in a tab, the demo running, the repository ready to share — fumbling for links wastes your limited minutes. Bring notes: a one-page sheet with your project stories' key numbers is perfectly acceptable; glancing at notes looks prepared, while forgetting your own results looks careless. Manage energy: speak slightly slower than feels natural, pause before answering hard questions, and smile — warmth is transmitted even through a screen. These details sound trivial, but interviewers are human: a candidate who is easy to talk to, organized, and calm under minor technical hiccups is simply more hireable. Preparation is respect — for the interviewer's time and for your own work. A final logistics note for in-person meetings, which still matter for academic supervision: bring a laptop with everything open and offline-capable where possible, carry a one-page printed summary of your portfolio with QR codes linking to the site and key projects, and arrive early enough to set up without rushing. Supervisors meeting many applicants remember the candidate whose materials were effortlessly accessible. Whether on screen or across a table, the principle is the same: remove every friction between the reviewer and your evidence, so the work — not the setup — is what they remember. Prepare thoroughly, present honestly, and let your portfolio do the persuading it was built to do.
For your research: Presenting your portfolio in an interview is a rehearsal for presenting your research at a conference or defending your thesis. The same structure applies: motivate the problem, explain your approach with its trade-offs, report results honestly against baselines, and discuss limitations and future work. The Q&A after a conference talk rewards exactly the same skills as interview Q&A — honest "I don't know" answers, contextualized numbers, and thoughtful next steps. Every portfolio presentation you give is training for the viva voce and the conference stage.
Key takeaways: - Prepare a five-minute story per project: Problem, Approach, Result, Reflection — practiced aloud until it flows. - Rehearse the live walkthrough: know your file order, clean the repo, test the demo, narrate as you guide. - Treat hard questions as opportunities: honest trade-offs, stated limitations, and cheerful "I don't know, here's how I'd find out" win. - In academic settings, explicitly connect portfolio evidence to research skills: experimentation, honesty, explanation, collaboration. - Send a focused follow-up linking the one or two most relevant projects; curate featured work per audience. - Practice deliberately: rehearse, record, mock-interview, and debrief every real interview.
A portfolio is not a monument you build once and admire forever; it is a garden that needs regular tending. Technologies change, your skills grow, old projects age, and new opportunities demand new evidence. This final chapter is about the long game: the habits and systems that keep your portfolio alive, relevant, and growing throughout your studies and career — so that the body of work you built with this book becomes the foundation of everything that follows, not a snapshot of one productive semester.
The quarterly review. Four times a year, spend half a day on portfolio maintenance. The agenda is fixed: (1) Update: refresh any project that changed — new results, bug fixes, dependency updates. A portfolio with broken installation instructions or dead demo links actively harms you, so test every demo link and quickstart during the review. (2) Prune: archive or remove work that no longer represents you. That first tutorial project served its purpose; it does not need to occupy a pinned slot. Pruning is not hiding failure — it is curation, and every museum curates. (3) Feature: rotate your pinned repositories and featured projects to match your current goals. Applying to NLP roles? Feature the LLM project. (4) Plan: choose the next piece to build or the next contribution to make, and put it on the calendar. Write a one-paragraph review note each quarter — what you updated, pruned, featured, and planned — and keep these notes; over years, they become a fascinating record of your growth.
Keeping projects alive (or letting them retire gracefully). Not every project needs to live forever. Distinguish three categories. Flagship projects — your best two or three — deserve ongoing care: keep them running, update dependencies yearly, and extend them when you learn something new. Archive projects — good work that is complete — get a final polish, a note in the README that they are complete and archived, and a graceful retirement; they remain as evidence but expect no updates. Retired projects — early experiments that no longer represent you — get privatized or deleted. Be deliberate about which is which, and revisit the classification yearly. A portfolio of three lovingly maintained flagships and a clean archive impresses far more than a graveyard of thirty decaying repos.
Growing new skills in public. Your portfolio should grow as you grow. Each year, aim to add one substantial new piece that stretches you: a project in a new domain, a new technique, a collaboration, or a deeper version of existing work. Document the learning, not just the outcome — a post titled "What I learned building my first real-time system" is valuable even if the system is modest. Also grow sideways: improve your communication (better READMEs, clearer posts), your collaboration (more open source), your teaching (tutorials, mentoring). Reviewers notice trajectory. A portfolio that shows someone moving from analysis to deployment to LLM applications to leading a small open-source contribution tells a story of accelerating growth — and growth is what every employer and supervisor is betting on.
Turning the portfolio into opportunity. A maintained portfolio does not just record your past; it generates your future. Keep it discoverable: share new posts and projects in relevant communities, keep your profile links current, and make sure your contact information is easy to find. Say yes to small visible opportunities that your portfolio earns you: a guest post, a meetup talk, helping a junior student — each extends your reputation. Track where opportunities come from: when someone contacts you because of a blog post or a project, note it. Over time you will see which parts of your portfolio work hardest, and you can invest accordingly. This feedback loop — build, publish, observe, invest — is how a portfolio becomes a career engine rather than a static showcase.
The long view: from portfolio to body of work. Step back and consider what you are really building. In five years, this portfolio will have become something larger: a public record of your professional identity. For a researcher, it merges with your publication record — papers, code, datasets, talks, posts — into a coherent body of work that defines your expertise. The habits in this book are the habits of that future: document as you go, publish honestly, curate deliberately, and keep growing. The students who maintain these habits do not just get better jobs or better PhD placements; they become the kind of professionals others seek out — the ones with evidence.
Start today, maintain quarterly, and never stop. Your portfolio is the story of what you can do, told in proof. Keep writing it.
For your research: Think of your portfolio maintenance routine as the personal equivalent of good lab practice: versioned, documented, reviewed, and archived. Labs that keep clean records produce trustworthy science; researchers who keep clean portfolios build trustworthy careers. As your thesis work matures into publications, fold each paper's code, data documentation, and reproducibility materials into your portfolio. In ten years, when someone asks what you have built, you will not point to a CV — you will point to a living body of work. That is what this book has been building toward.
Key takeaways: - A portfolio is a garden, not a monument: tend it quarterly or it decays. - The quarterly review: update demos and instructions, prune outdated work, rotate featured projects, plan the next piece. - Classify projects as flagship (maintain), archive (complete and retire gracefully), or retired (privatize) — and revisit yearly. - Add one substantial new piece per year that stretches you; document the learning, and grow sideways in communication and collaboration. - Keep the portfolio discoverable and track which pieces generate opportunities; invest where the evidence points. - The long-term goal is a coherent body of work where portfolio and publication record merge into professional identity.
[1] A. Géron, Hands-On Machine Learning with Scikit-Learn, Keras, and TensorFlow, 3rd ed. Sebastopol, CA, USA: O'Reilly Media, 2022. [2] W. McKinney, Python for Data Analysis: Data Wrangling with pandas, NumPy, and Jupyter, 3rd ed. Sebastopol, CA, USA: O'Reilly Media, 2022. [3] J. VanderPlas, Python Data Science Handbook: Essential Tools for Working with Data, 2nd ed. Sebastopol, CA, USA: O'Reilly Media, 2023. [4] C. Molnar, Interpretable Machine Learning: A Guide for Making Black Box Models Explainable, 2nd ed. Leanpub, 2022. [5] E. Burnaev et al., "Model cards for model reporting," in Proc. Conf. Fairness, Accountability, and Transparency (FAT), Atlanta, GA, USA, 2019, pp. 220–229. [6] M. Abadi et al., "TensorFlow: Large-scale machine learning on heterogeneous distributed systems," arXiv:1603.04467, 2016. [7] T. Mikolov et al., "Efficient estimation of word representations in vector space," arXiv:1301.3781, 2013. [8] A. Vaswani et al., "Attention is all you need," in Proc. 31st Int. Conf. Neural Information Processing Systems (NeurIPS), Long Beach, CA, USA, 2017, pp. 5998–6008. [9] J. Devlin et al., "BERT: Pre-training of deep bidirectional transformers for language understanding," in Proc. 2019 Conf. North American Chapter Assoc. Computational Linguistics (NAACL), Minneapolis, MN, USA, 2019, pp. 4171–4186. [10] T. Brown et al., "Language models are few-shot learners," in Proc. 34th Int. Conf. Neural Information Processing Systems (NeurIPS)*, Vancouver, BC, Canada, 2020, pp. 1877–1901.
End of Book 48.